Skip to content

Django - Webframework

Python3
  • Django ist ein Webframework was auf Python basiert. Was liegt also näher, als das jetzt mal auszuprobieren, wo ich ein wenig Python kenne. Ich kann mich noch gut erinnern, wie ich das mal vor ca. zwei Jahren ausprobieren wollte, bin ich kläglich gescheitert. Grund waren damals mangelnde Python Kenntnisse. Aktuell sollte die Kenntnisse reichen um das zu mindestens mal zu testen.

    Es gibt zwei gute Tutorials

    Das war jetzt nicht so schwer, bis auf die Tatsache das die immer alle lokal ausprobieren. Das mache ich immer erst, wenn ich weiß wie das alles funktioniert. Vorher teste ich auf meinem ROCKPro64 und wenn ich den versaut 😉 habe, wird der neu installiert - fertig!

    Ok, der Webserver mit der Anwendung wird normalerweise auf dem Localhost ausgeliefert.

    (myvenv) frank@debian:~/djangogirls$ python manage.py runserver
    Performing system checks...
    
    System check identified no issues (0 silenced).
    August 29, 2021 - 08:52:38
    Django version 3.2.6, using settings 'mysite.settings'
    Starting development server at http://127.0.0.1:8000/
    Quit the server with CONTROL-C.
    

    Nicht so praktisch, wenn ich das von einem Haupt-PC aus erreichen möchte. Es gibt dazu eine Konfigurationsdatei

    nano mysite/settings.py
    

    Darin steht als Standard, das hier.

    # SECURITY WARNING: don't run with debug turned on in production!
    DEBUG = True
    ALLOWED_HOSTS = []
    

    Wenn DEBUG auf True gesetzt ist und ALLOWED_HOSTS leer, dann wird der "Host" gegen ['localhost', '127.0.0.1', '[::1]'] validiert.

    Wenn ich den Webserver aufrufe, kommt das hier

    098201d9-5489-440e-bf72-a047aa192463-grafik.png

    Diese Ausgabe auf dem Webserver steht dort wegen

    DEBUG = True
    

    das ist natürlich auf einem produktivem Server eine schlechte Idee. Darum auch die Warnung eine Zeile drüber!
    Aber zum Glück, da steht auch die Lösung meines Problemes 🙂

     SECURITY WARNING: don't run with debug turned on in production!
     DEBUG = True
     ALLOWED_HOSTS = ['192.68.3.172']
    

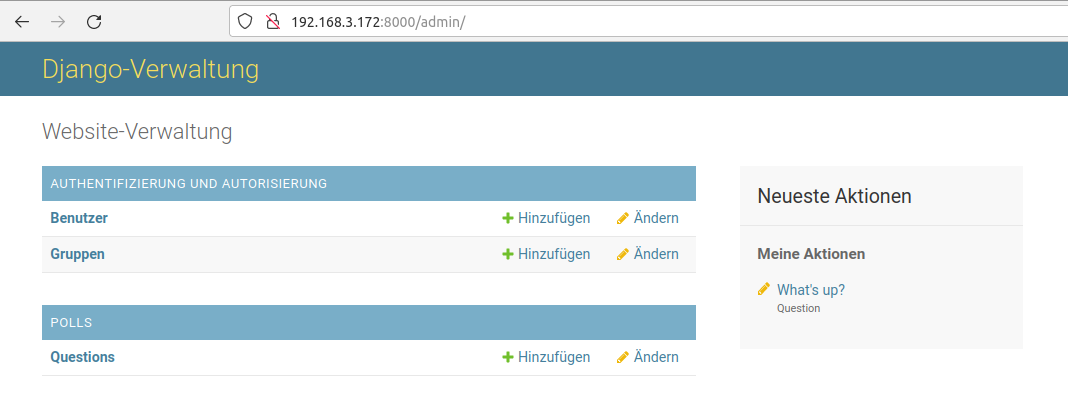
    Man fügt die IP-Adresse hinzu und startet dann den Webserver mit

    (myvenv) frank@debian:~/djangogirls$ python manage.py runserver 0:8000
    Watching for file changes with StatReloader
    Performing system checks...
    
    System check identified no issues (0 silenced).
    August 29, 2021 - 11:37:16
    Django version 3.2.6, using settings 'mysite.settings'
    Starting development server at http://0:8000/
    Quit the server with CONTROL-C.
    

    0:8000 ist eine Abkürzung für 0.0.0.0:8000 Damit ist der Webserver jetzt über die IP-Adresse erreichbar.

    296ab523-d860-4f82-b815-f195209e50fb-grafik.png

  • Restic UI - QThread

    Restic UI
    1
    0 Stimmen
    1 Beiträge
    95 Aufrufe
    Niemand hat geantwortet
  • Python3 - PyQt5 QIcon

    Python3
    2
    0 Stimmen
    2 Beiträge
    101 Aufrufe
    FrankMF

    Die Suchpfade findet man hiermit

    print(QIcon.themeSearchPaths())

    Ausgabe

    ['/home/frank/.icons', '/usr/share/cinnamon/icons', '/var/lib/flatpak/exports/share/icons', '/usr/share/icons', ':/icons']
  • Restic UI - Changelog

    Angeheftet Restic UI
    3
    0 Stimmen
    3 Beiträge
    264 Aufrufe
    FrankMF

    v1.5.0 - Release for restic v0.14.0 with compression and migration tool

  • Python3 - HTML Text ausgeben

    Python3
    1
    0 Stimmen
    1 Beiträge
    121 Aufrufe
    Niemand hat geantwortet
  • Python3 - PyQt5 Layout

    Python3
    1
    0 Stimmen
    1 Beiträge
    147 Aufrufe
    Niemand hat geantwortet
  • Python3 - virtuelle Entwicklungsumgebung

    Angeheftet Python3
    3
    0 Stimmen
    3 Beiträge
    301 Aufrufe
    FrankMF

    Nach Systemwechsel erneut Probleme. Hier noch mal aufgelistet.

    Aufpassen, das kein venv Ordner vorhanden ist! Neu anlegen!

    python3 -m venv venv

    Dann meckert mein Linux Mint Cinnamon

    The virtual environment was not created successfully because ensurepip is not available. On Debian/Ubuntu systems, you need to install the python3-venv package using the following command. apt install python3.8-venv You may need to use sudo with that command. After installing the python3-venv package, recreate your virtual environment. Failing command: ['/home/frank/Restic_UI_Produktiv/restic-ui-public/venv/bin/python3', '-Im', 'ensurepip', '--upgrade', '--default-pip']

    Ok, das ist einfach 😉

    apt install python3.8-venv python3 -m venv venv

    Danach aktivieren

    source venv/bin/activate Installation von PyQt5 (venv) frank@frank-MS-7C37:~/Restic_UI_Produktiv/restic-ui-public$ pip3 install PyQt5 Collecting PyQt5 Downloading PyQt5-5.15.4-cp36.cp37.cp38.cp39-abi3-manylinux2014_x86_64.whl (8.3 MB) |████████████████████████████████| 8.3 MB 1.7 MB/s Collecting PyQt5-Qt5>=5.15 Downloading PyQt5_Qt5-5.15.2-py3-none-manylinux2014_x86_64.whl (59.9 MB) |████████████████████████████████| 59.9 MB 18.3 MB/s Collecting PyQt5-sip<13,>=12.8 Downloading PyQt5_sip-12.9.0-cp38-cp38-manylinux1_x86_64.whl (332 kB) |████████████████████████████████| 332 kB 46.1 MB/s Installing collected packages: PyQt5-Qt5, PyQt5-sip, PyQt5 Successfully installed PyQt5-5.15.4 PyQt5-Qt5-5.15.2 PyQt5-sip-12.9.0

    Danach meckert er über ein fehlendes Modul requests

    (venv) frank@frank-MS-7C37:~/Restic_UI_Produktiv/restic-ui-public$ python3 restic_ui.py Traceback (most recent call last): File "restic_ui.py", line 41, in <module> from functions import ( File "/home/frank/Restic_UI_Produktiv/restic-ui-public/functions.py", line 19, in <module> import requests as req ModuleNotFoundError: No module named 'requests' Installation requests (venv) frank@frank-MS-7C37:~/Restic_UI_Produktiv/restic-ui-public$ pip3 install requests Collecting requests Downloading requests-2.25.1-py2.py3-none-any.whl (61 kB) |████████████████████████████████| 61 kB 802 kB/s Collecting chardet<5,>=3.0.2 Downloading chardet-4.0.0-py2.py3-none-any.whl (178 kB) |████████████████████████████████| 178 kB 2.7 MB/s Collecting certifi>=2017.4.17 Downloading certifi-2021.5.30-py2.py3-none-any.whl (145 kB) |████████████████████████████████| 145 kB 14.0 MB/s Collecting idna<3,>=2.5 Downloading idna-2.10-py2.py3-none-any.whl (58 kB) |████████████████████████████████| 58 kB 9.4 MB/s Collecting urllib3<1.27,>=1.21.1 Downloading urllib3-1.26.6-py2.py3-none-any.whl (138 kB) |████████████████████████████████| 138 kB 11.5 MB/s Installing collected packages: chardet, certifi, idna, urllib3, requests Successfully installed certifi-2021.5.30 chardet-4.0.0 idna-2.10 requests-2.25.1 urllib3-1.26.6

    Und schwupps, geht mein Tool wieder 🙂

    4968ce42-7c66-4c8a-a2ad-424b9a529d87-grafik.png

  • 0 Stimmen
    2 Beiträge
    209 Aufrufe
    FrankMF

    Dinge entwickeln sich. Es sieht alles schon wieder was anders aus 🙂

    Hauptfenster
    270b5c68-3d64-44ca-9a01-e3f24ba4a26c-grafik.png

    Setup Fenster zum Erstellen der wg0.conf
    27c3cb28-50f5-4e00-b03d-de47c07372a0-grafik.png

    Und alles funktioniert so weit 🤓

  • Wichtige Links

    Angeheftet Python3
    1
    0 Stimmen
    1 Beiträge
    170 Aufrufe
    Niemand hat geantwortet