Und wenn das auch nicht geht, dann geht das 🙂
ps aux | grep "/usr/bin/kvm -id VMID" kill -9 PIDProxmox - Neue HDD hinzufügen
-
Proxmox macht vieles wie Linux, aber nicht alles. Aber, es hat ein sehr gutes Konzept und eine sehr gute Anleitung.
Nehmen wir an, wir hätten eine neue HDD und wollen diese für unseren Proxmox nutzen. Am Anfang muss man sich ganz schön Gedanken machen, wie man die Festplatten usw. nutzt. Mein aktueller Stand vor dem Einbau.
- SSD 240GB Betriebssystem
- NVMe SSD 500GB für die VM's
Meine aktuelle Struktur sieht so aus
root@frank-mankel:~# pvesm status
Name             Type     Status           Total            Used       Available        %
VM            lvmthin     active       488136704        23284120       464852583    4.77%
local             dir     active        57278576         3119556        51219732    5.45%
local-lvm     lvmthin     active       147275776               0       147275776    0.00%
Mit fdsik -l sehen wir nach dem Einbau folgendes
Disk /dev/sdb: 3.7 TiB, 4000787030016 bytes, 7814037168 sectors
Disk model: WDC WD40EZRZ-00G
Units: sectors of 1 * 512 = 512 bytes
Sector size (logical/physical): 512 bytes / 4096 bytes
I/O size (minimum/optimal): 4096 bytes / 4096 bytes
Mein Plan ist es, die Platte in zwei Partitionen zu unterteilen.
root@frank-mankel:~# gdisk
GPT fdisk (gdisk) version 1.0.3

Type device filename, or press <Enter> to exit: /dev/sdb
Partition table scan:
  MBR: not present
  BSD: not present
  APM: not present
  GPT: not present

Creating new GPT entries.

Command (? for help): n
Partition number (1-128, default 1):
First sector (34-7814037134, default = 2048) or {+-}size{KMGTP}:
Last sector (2048-7814037134, default = 7814037134) or {+-}size{KMGTP}: 3907018567
Current type is 'Linux filesystem'
Hex code or GUID (L to show codes, Enter = 8300):
Changed type of partition to 'Linux filesystem'

Command (? for help): n
Partition number (2-128, default 2):
First sector (34-7814037134, default = 3907018752) or {+-}size{KMGTP}:
Last sector (3907018752-7814037134, default = 7814037134) or {+-}size{KMGTP}:
Current type is 'Linux filesystem'
Hex code or GUID (L to show codes, Enter = 8300):
Changed type of partition to 'Linux filesystem'

Command (? for help): p
Disk /dev/sdb: 7814037168 sectors, 3.6 TiB
Model: WDC WD40EZRZ-00G
Sector size (logical/physical): 512/4096 bytes
Disk identifier (GUID): E625BB03-8BE4-49B4-9089-78D236650F3E
Partition table holds up to 128 entries
Main partition table begins at sector 2 and ends at sector 33
First usable sector is 34, last usable sector is 7814037134
Partitions will be aligned on 2048-sector boundaries
Total free space is 2198 sectors (1.1 MiB)

Number  Start (sector)    End (sector)  Size       Code  Name
   1            2048      3907018567   1.8 TiB     8300  Linux filesystem
   2      3907018752      7814037134   1.8 TiB     8300  Linux filesystem

Command (? for help): w

Final checks complete. About to write GPT data. THIS WILL OVERWRITE EXISTING
PARTITIONS!!

Do you want to proceed? (Y/N): Y
OK; writing new GUID partition table (GPT) to /dev/sdb.
The operation has completed successfully.
Nun haben wir zwei Partitionen.
Disk /dev/sdb: 3.7 TiB, 4000787030016 bytes, 7814037168 sectors
Disk model: WDC WD40EZRZ-00G
Units: sectors of 1 * 512 = 512 bytes
Sector size (logical/physical): 512 bytes / 4096 bytes
I/O size (minimum/optimal): 4096 bytes / 4096 bytes
Disklabel type: gpt
Disk identifier: E625BB03-8BE4-49B4-9089-78D236650F3E

Device          Start        End    Sectors  Size Type
/dev/sdb1        2048 3907018567 3907016520  1.8T Linux filesystem
/dev/sdb2  3907018752 7814037134 3907018383  1.8T Linux filesystem
Partition 1 formatieren
root@frank-mankel:~# mkfs.ext4 /dev/sdb1
mke2fs 1.44.5 (15-Dec-2018)
Creating filesystem with 488377065 4k blocks and 122101760 inodes
Filesystem UUID: a9a466bb-61db-4500-8027-225421460f6e
Superblock backups stored on blocks:
	32768, 98304, 163840, 229376, 294912, 819200, 884736, 1605632, 2654208,
	4096000, 7962624, 11239424, 20480000, 23887872, 71663616, 78675968,
	102400000, 214990848

Allocating group tables: done
Writing inode tables: done
Creating journal (262144 blocks): done
Writing superblocks and filesystem accounting information: done
Der Plan
Ich mache aus der ersten Partition einen Datenspeicher für Backups. Darum habe ich auch in ext4 formatiert. In der Anleitung steht dann folgendes.
Backup files dump/Configuration Example (/etc/pve/storage.cfg)
dir: backup
path /mnt/backup
content backup
maxfiles 7Above configuration defines a storage pool called backup. That pool can be used to store up to 7 backups (maxfiles 7) per VM. The real path for the backup files is /mnt/backup/dump/....
Ok, das Probieren wir. Das Verzeichnis erstellt.
root@frank-mankel:~# mkdir /mnt/backup/
root@frank-mankel:~# mkdir /mnt/backup/dump
Dann die Datei bearbeiten
nano /etc/pve/storage.cfgInhalt
dir: local
        path /var/lib/vz
        content iso,vztmpl,backup

lvmthin: local-lvm
        thinpool data
        vgname pve
        content rootdir,images

lvmthin: VM
        thinpool VM
        vgname VM
        content images,rootdir
        nodes frank-mankel

dir: backup
        path /mnt/backup
        content backup
        maxfiles 7
Das dir:backup habe ich hinzugefügt. Einmal F5 im Webinterface drücken.

Schwupps, da ist das Backup-Verzeichnis.
Test, Backup von einem Container erstellt.
root@frank-mankel:~# ls -la /mnt/backup/dump
total 381384
drwxr-xr-x 2 root root      4096 Jul 23 16:56 .
drwxr-xr-x 3 root root      4096 Jul 23 16:54 ..
-rw-r--r-- 1 root root       527 Jul 23 16:56 vzdump-lxc-102-2019_07_23-16_56_04.log
-rw-r--r-- 1 root root 390521711 Jul 23 16:56 vzdump-lxc-102-2019_07_23-16_56_04.tar.lzo
Die Struktur jetzt
root@frank-mankel:~# pvesm status
Name             Type     Status           Total            Used       Available        %
VM            lvmthin     active       488136704        23284120       464852583    4.77%
backup            dir     active        57278576         3501916        50837372    6.11%
local             dir     active        57278576         3501916        50837372    6.11%
local-lvm     lvmthin     active       147275776               0       147275776    0.00%
Das sieht so weit gut aus, hoffe ich
")
Wer aufgepasst hat, es ist noch eine Partition frei. Dafür gibt es auch schon einen Plan
")
-
Hoppla, da passt was nicht.
root@frank-mankel:~# pvesm status
Name             Type     Status           Total            Used       Available        %
VM            lvmthin     active       488136704        23284120       464852583    4.77%
backup            dir     active        57278576         3501916        50837372    6.11%
local             dir     active        57278576         3501916        50837372    6.11%
local-lvm     lvmthin     active       147275776               0       147275776    0.00%
Hier sieht man, das backup ca. 50GB groß ist. Da die Partition deutlich größer ist, fehlt da was!?? Kurz mal nachgedacht und gesucht.....
Der Eintrag in /etc/fstab muss natürlich auch vorhanden sein, so wie gewohnt. Danach
root@frank-mankel:~# pvesm status
Name             Type     Status           Total            Used       Available        %
VM            lvmthin     active       488136704        23284120       464852583    4.77%
backup            dir     active      1921797220           77856      1824027568    0.00%
local             dir     active        57278576         3502984        50836304    6.12%
local-lvm     lvmthin     active       147275776               0       147275776    0.00%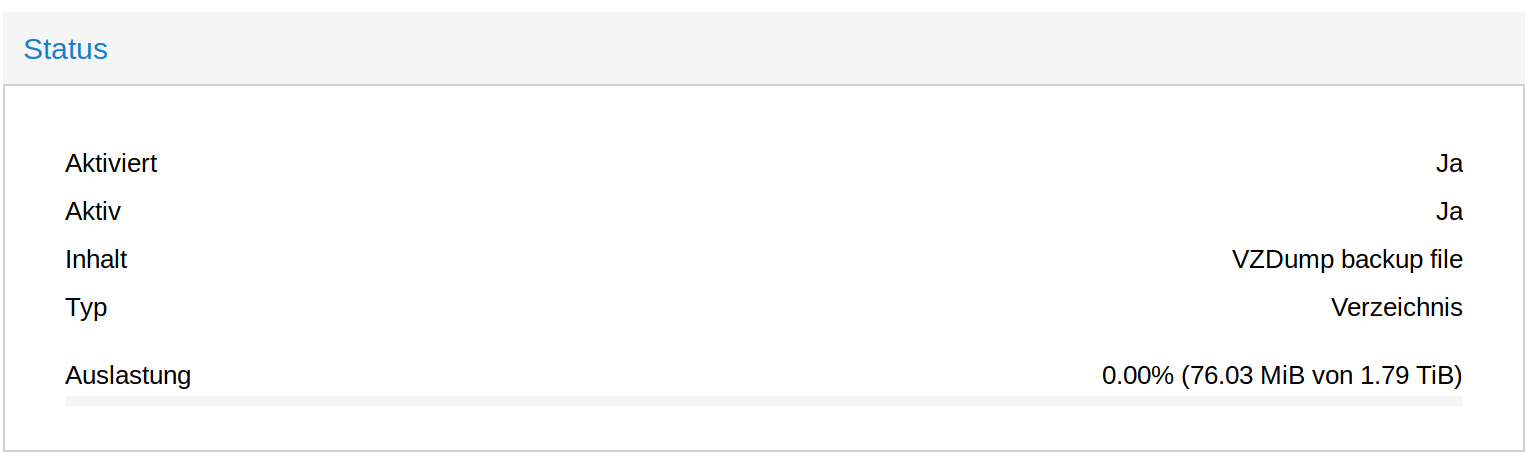
Mein vorhin erstelltes Backup war weg. Also aufpassen!!
-
Fritzbox - Proxmox - pfSense - IPv6
Verschoben Linux -
-
-
-
-
-
-