Skip to content

Restic UI - mein zweites Python3 Projekt

Python3
  • Ich habe mal ein kleines UI für Restic erstellt. Das ist das Resultat, wenn man sich ein wenig Python3 und PyQt5 versucht beizubringen 🙂

    Der Code wird vermutlich keinen professionellen Ansprüchen genügen, mir hat er aber sehr viel Wissen neu vermittelt.

    Sollte so zu 98% fertig sein und neue Ideen zur Verbesserung sind auch schon im Kopf.

    Funktionen

    • init
    • backup
    • mount
    • restore
    • check
    • prune
    • snapshots

    sind drin und eine Funtion, mehrere Backups zu verwalten.

  • Noch ein kurzes Video zum Tool.

  • Ja, ich bin immer noch dran mich in Python3 und PyQT5 einzuarbeiten bzw. zu erlernen 😉

    Nachdem ich am Anfang alles mit einem JSON-File gemacht habe, habe ich die letzten Tage alles umgebaut. Ich nutze nun eine Klasse um mit den Daten zu hantieren, das JSON-File dient noch zur dauerhaften Speicherung der Daten.

    Es waren wieder interessante Stunden, in denen ich hoffentlich viel gelernt habe. Da ich aber bei solchen Dingen immer wieder feststelle, das man es besser machen kann 🙂 werde ich wohl bald mal anfangen es von vorne anzugehen.

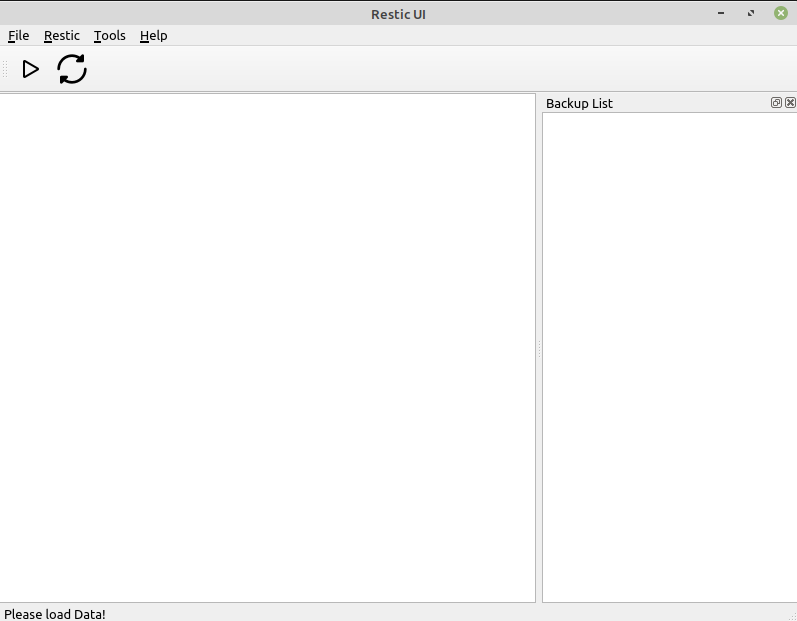
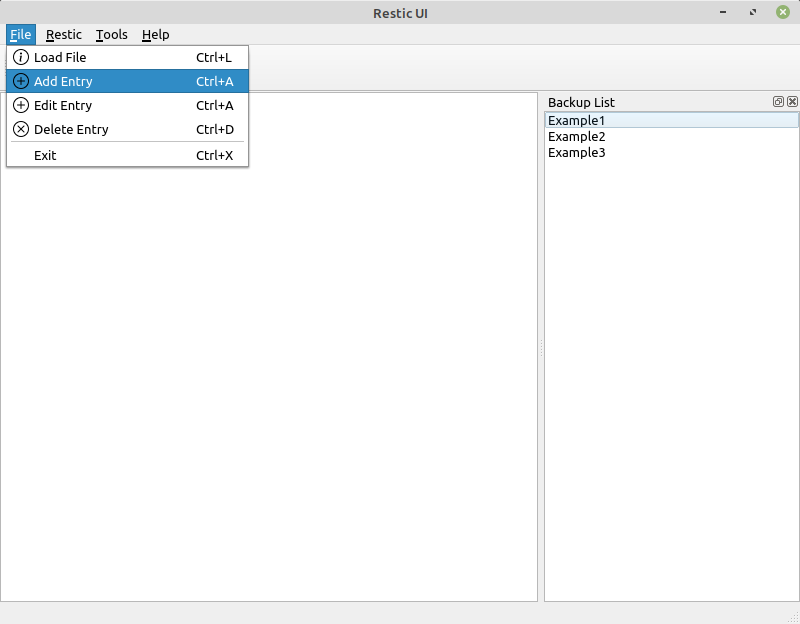
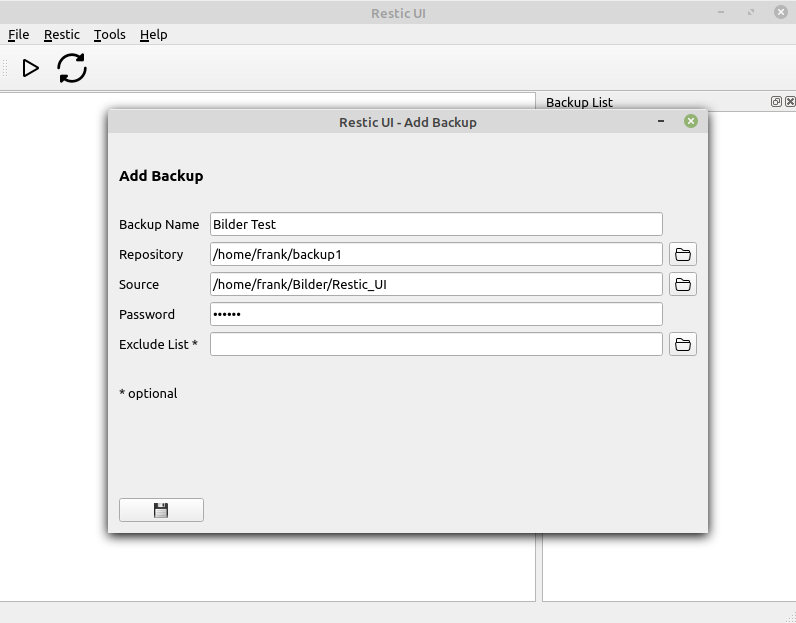
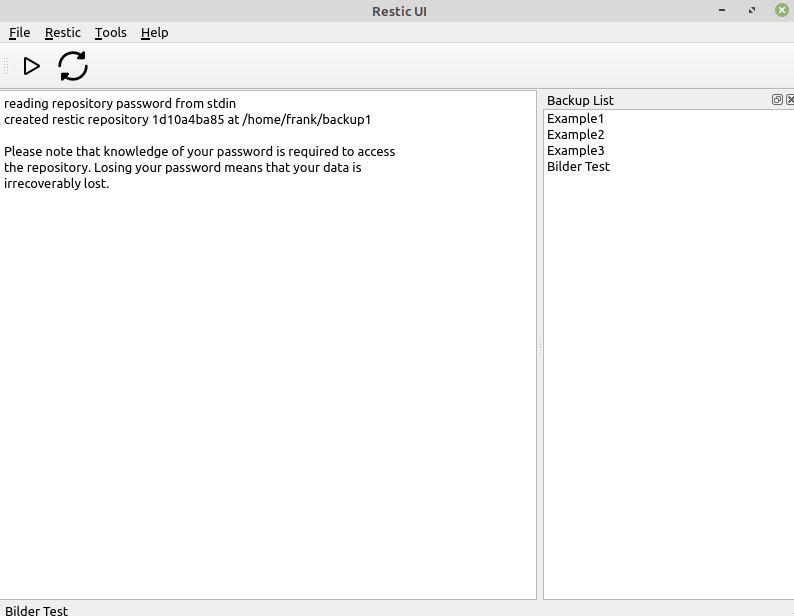
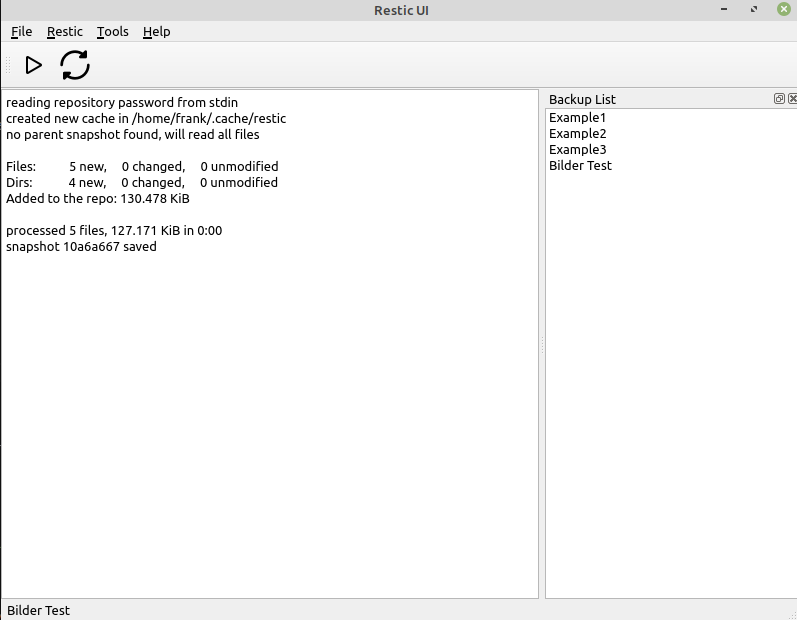
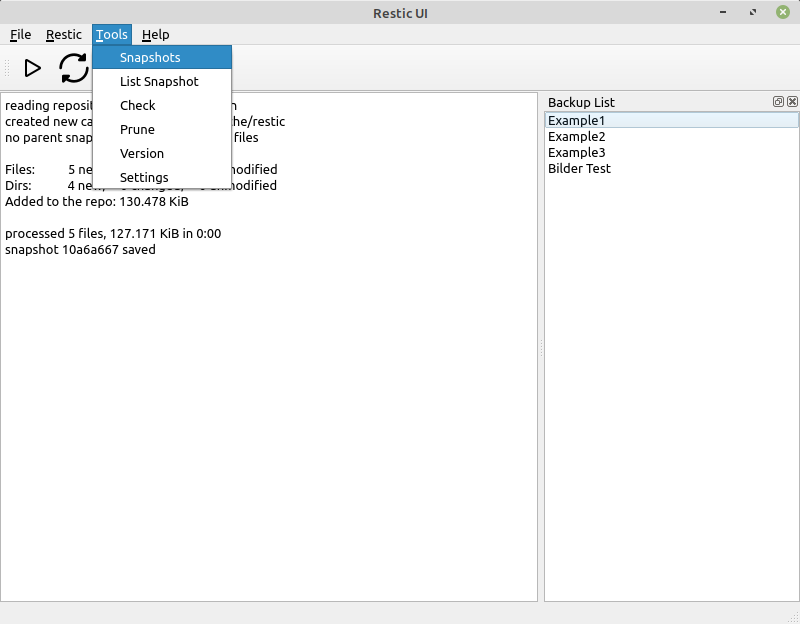
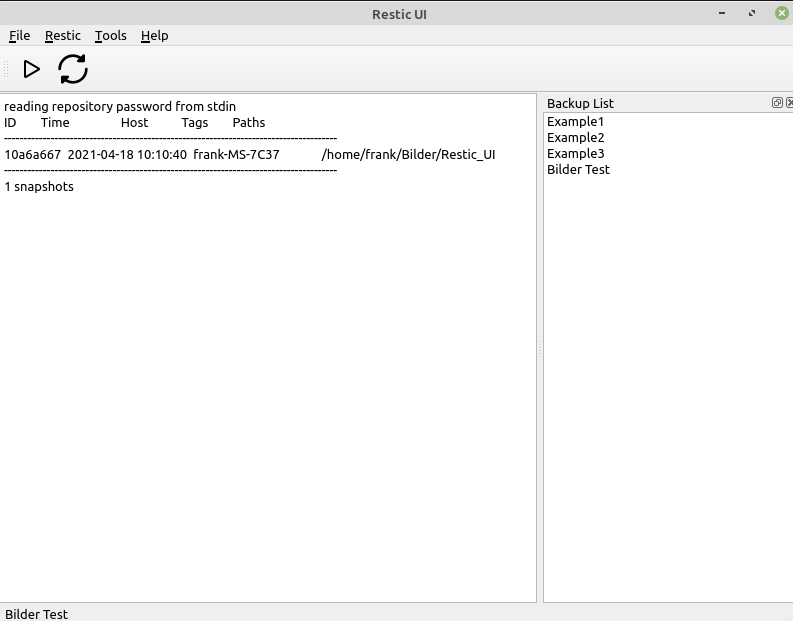
    Hier ein paar Eindrücke.

    Start.png

    add.png

    add2.png

    init2.png

    backup.png

    snapshot.png

    snapshot2.png

    Das soll mal reichen 😉

  • Hallo,
    das interessiert mich brennend!
    Kann man das Ganze denn mal selbst probieren?
    VG

  • @berthold Hallo Berthold. Ich bin eigentlich immer noch nicht mit meinem Code zufrieden. Ist man das jemals? Da ich auch noch ein kleines Problem habe, würde ich da ungerne jemanden reinschauen lassen. Der Code ist stellenweise in deutsch kommentiert, stellenweise in englisch. Kennt man ja, man will es irgendwann mal ordentlich machen und dann kommt das nächste Problem auf einen zu.

    Hast Du Python3 Vorkenntnisse? Wenn Du "brennend" dran interessiert bist, könnte ich Dir evt. Zugang zu meinem Gitlab-Projekt geben.

    Wenn Du interessiert bist und ich dich nicht los werde :), dann schreib mir eine PN.

  • 0 Stimmen
    5 Beiträge
    141 Aufrufe
    FrankMF

    Hab ChatGPT nochmal nach der Installation auf einem Production Server befragt.

    ChatGPT

    Certainly! Here's a short example of the steps you can follow to deploy a Flask application on a production server using Nginx and Gunicorn:

    Prepare your server:

    Set up a server (e.g., using a cloud provider like AWS, DigitalOcean, or a dedicated server) and ensure it has a clean, up-to-date installation of a Linux distribution (e.g., Ubuntu or CentOS).

    Install required software:

    Install necessary software packages on your server. You'll need Python, pip (Python package manager), Nginx, and Gunicorn. You can use your distribution's package manager (e.g., apt for Ubuntu or yum for CentOS) to install these dependencies.

    Deploy your Flask application:

    Copy your Flask application code and any required dependencies to your server.

    Set up a virtual environment (optional but recommended):

    Create a virtual environment for your Flask application to isolate its dependencies. You can use venv or virtualenv for this purpose.

    Install Flask and any required Python packages within your virtual environment:

    pip install flask

    Test your Flask application:

    Ensure your Flask application runs correctly within your server's virtual environment.

    Configure Gunicorn:

    Create a Gunicorn configuration file (e.g., gunicorn_config.py) to specify the settings for running your Flask application. Here's a simple example: workers = 4 # Number of Gunicorn worker processes bind = '0.0.0.0:8000' # The address and port Gunicorn should listen on

    Start Gunicorn:

    Start Gunicorn with your Flask application: gunicorn -c gunicorn_config.py your_app:app

    Configure Nginx:

    Create an Nginx server block (often located in /etc/nginx/sites-available) to define how Nginx should handle incoming requests. Here's a simplified example: server { listen 80; server_name your_domain.com www.your_domain.com; location / { proxy_pass http://127.0.0.1:8000; # Pass requests to Gunicorn proxy_set_header Host $host; proxy_set_header X-Real-IP $remote_addr; } }

    Enable the Nginx server block and restart Nginx:

    sudo ln -s /etc/nginx/sites-available/your_config /etc/nginx/sites-enabled/ sudo nginx -t # Test Nginx configuration sudo systemctl restart nginx

    Configure your DNS:

    Point your domain name to your server's IP address.

    Secure your server (optional but recommended):

    Set up SSL/TLS certificates for your domain to enable HTTPS. You can use Let's Encrypt for free SSL certificates.

    Monitor your application:

    Set up monitoring tools and logs to keep track of your application's performance and troubleshoot any issues.

    These are the basic steps to deploy a Flask application on a production server with Nginx and Gunicorn. Please note that this is a simplified example, and there are many additional considerations, such as database configuration, security, and optimization, depending on your specific application and requirements. It's also important to keep your server and software up to date and follow security best practices to ensure the stability and security of your production environment.

    Das werde ich doch mal ausprobieren 😎

  • Restic UI - PyWebIO

    Python3
    3
    0 Stimmen
    3 Beiträge
    251 Aufrufe
    FrankMF

  • 0 Stimmen
    3 Beiträge
    166 Aufrufe
    FrankMF

    Hallo @berthold, du bist mein einziger Star 🙂 Ok, darum geht es mir ja nicht, wie Du weißt mache ich das hauptsächlich für mich und meine Backups klappen damit sehr gut. Ist also produktiv einsetzbar.

    Wie Du gemerkt hast, gibt es Zeiten da mache ich ganz viel und dann wieder Zeiten da passiert nix. Das ist bei mir normal, ich muss da "Bock" drauf haben. Habe ich viel Stress auf der Arbeit, passiert Abends eher sehr wenig..

    Ich hoffe das ich mittlerweile alle Fehler gefunden habe, die Grundfunktionen sind alle funktional. Mittlerweile kann man die JSON Datei mit den Daten der Backups auf Wunsch auch verschlüsseln 🙂

    Ich habe noch eine ganze Reihe an Notizen, was ich gerne noch machen möchte. Wichtig ist mir aber im Moment, das ich alle Fehler finde und das so wie es jetzt ist, einwandfrei läuft.

    Darum, wenn es jemand nutzt, bitte gebt Feedback. Egal ob positiv oder negativ. Ich freue mich persönlich natürlich mehr über positives Feedback 🙂

  • Python3 - Struktur eines Projektes

    Python3
    1
    0 Stimmen
    1 Beiträge
    109 Aufrufe
    Niemand hat geantwortet
  • PyQt5 - QThread

    Python3
    3
    0 Stimmen
    3 Beiträge
    140 Aufrufe
    FrankMF

    Und hier mal ein komplettes Beispiel.

    class Worker

    Wir legen den Worker an, das ist der Prozess der die Arbeit macht und etwas länger braucht.

    class Worker(QObject): """ Worker Class for Rest function stats""" stats_finished = pyqtSignal(str) stats_error = pyqtSignal(str) def __init__(self): super().__init__() def run(self): # Restic function try: # long running task except Exception: # Process don't successful, send signal self.stats_error.emit(result.stderr) else: # Process successful, send signal self.stats_finished.emit(result.stdout) finally: pass in class MainWindow class MainWindow(QMainWindow): def __init__(self): super().__init__() "First Thread with documentation" # Worker for restic_stats # Create a QThread object self.thread = QThread() # Create a worker object self.worker1 = Worker() # Move worker to the thread self.worker1.moveToThread(self.thread) # Connect signals and slots self.thread.started.connect(self.worker1.run) self.worker1.stats_finished[str].connect(self.restic_stats_finished) self.worker1.stats_error[str].connect(self.restic_stats_error) "First thread end" ############################################### # Process for restic_stats is finished ############################################### @pyqtSlot(str) def restic_stats_finished(self, i): # Signal from worker thread without an error Spinner.stop(self) self.thread.quit() ############################################### # Process for restic_stats when get an error ############################################### @pyqtSlot(str) def restic_stats_error(self, i): # Signal from worker thread with an error! Spinner.stop(self) Funktion restic_stats def restic_stats(self): # we start the worker thread self.thread.start() # we start waitingspinnerwidget Spinner.start(self)

    Ich wollte gerade schreiben, das folgendes sehr wichtig ist

    self.thread.quit()

    da fällt mir ein Fehler auf. Kurz ausprobiert und bingo, wenn der Prozess einen Error triggert, muss natürlich auch der Prozess beendet werden. Wenn man das nicht macht, macht das Programm nicht das was es soll. Der Grund ist, das der Prozess einfach immer weiter läuft. Er MUSS beendet werden. Ich gehe dann mal in meinem Programm alles ändern 🙂

    Ok, jetzt geht die Funktion auch zweimal hintereinander und gibt auch ordentlich den Fehler aus.

    Fazit

    Ich habe wieder sehr viel gelernt und hoffe das ich es auch richtig verstanden habe 😉 Hoffe das es dem ein oder anderen Anfänger hilft. Und falls hier ein Profi mitliest und hier Blödsinn steht bitte ich um einen Kommentar, damit ich das ändern kann. Es steht schon genug Blödsinn im Netz 🙂

  • Python3 - Umzug nach Fedora 34

    Python3
    1
    0 Stimmen
    1 Beiträge
    145 Aufrufe
    Niemand hat geantwortet
  • Python3 - virtuelle Entwicklungsumgebung

    Angeheftet Python3
    3
    0 Stimmen
    3 Beiträge
    301 Aufrufe
    FrankMF

    Nach Systemwechsel erneut Probleme. Hier noch mal aufgelistet.

    Aufpassen, das kein venv Ordner vorhanden ist! Neu anlegen!

    python3 -m venv venv

    Dann meckert mein Linux Mint Cinnamon

    The virtual environment was not created successfully because ensurepip is not available. On Debian/Ubuntu systems, you need to install the python3-venv package using the following command. apt install python3.8-venv You may need to use sudo with that command. After installing the python3-venv package, recreate your virtual environment. Failing command: ['/home/frank/Restic_UI_Produktiv/restic-ui-public/venv/bin/python3', '-Im', 'ensurepip', '--upgrade', '--default-pip']

    Ok, das ist einfach 😉

    apt install python3.8-venv python3 -m venv venv

    Danach aktivieren

    source venv/bin/activate Installation von PyQt5 (venv) frank@frank-MS-7C37:~/Restic_UI_Produktiv/restic-ui-public$ pip3 install PyQt5 Collecting PyQt5 Downloading PyQt5-5.15.4-cp36.cp37.cp38.cp39-abi3-manylinux2014_x86_64.whl (8.3 MB) |████████████████████████████████| 8.3 MB 1.7 MB/s Collecting PyQt5-Qt5>=5.15 Downloading PyQt5_Qt5-5.15.2-py3-none-manylinux2014_x86_64.whl (59.9 MB) |████████████████████████████████| 59.9 MB 18.3 MB/s Collecting PyQt5-sip<13,>=12.8 Downloading PyQt5_sip-12.9.0-cp38-cp38-manylinux1_x86_64.whl (332 kB) |████████████████████████████████| 332 kB 46.1 MB/s Installing collected packages: PyQt5-Qt5, PyQt5-sip, PyQt5 Successfully installed PyQt5-5.15.4 PyQt5-Qt5-5.15.2 PyQt5-sip-12.9.0

    Danach meckert er über ein fehlendes Modul requests

    (venv) frank@frank-MS-7C37:~/Restic_UI_Produktiv/restic-ui-public$ python3 restic_ui.py Traceback (most recent call last): File "restic_ui.py", line 41, in <module> from functions import ( File "/home/frank/Restic_UI_Produktiv/restic-ui-public/functions.py", line 19, in <module> import requests as req ModuleNotFoundError: No module named 'requests' Installation requests (venv) frank@frank-MS-7C37:~/Restic_UI_Produktiv/restic-ui-public$ pip3 install requests Collecting requests Downloading requests-2.25.1-py2.py3-none-any.whl (61 kB) |████████████████████████████████| 61 kB 802 kB/s Collecting chardet<5,>=3.0.2 Downloading chardet-4.0.0-py2.py3-none-any.whl (178 kB) |████████████████████████████████| 178 kB 2.7 MB/s Collecting certifi>=2017.4.17 Downloading certifi-2021.5.30-py2.py3-none-any.whl (145 kB) |████████████████████████████████| 145 kB 14.0 MB/s Collecting idna<3,>=2.5 Downloading idna-2.10-py2.py3-none-any.whl (58 kB) |████████████████████████████████| 58 kB 9.4 MB/s Collecting urllib3<1.27,>=1.21.1 Downloading urllib3-1.26.6-py2.py3-none-any.whl (138 kB) |████████████████████████████████| 138 kB 11.5 MB/s Installing collected packages: chardet, certifi, idna, urllib3, requests Successfully installed certifi-2021.5.30 chardet-4.0.0 idna-2.10 requests-2.25.1 urllib3-1.26.6

    Und schwupps, geht mein Tool wieder 🙂

    4968ce42-7c66-4c8a-a2ad-424b9a529d87-grafik.png

  • Restic v0.11.0 released

    Restic
    1
    0 Stimmen
    1 Beiträge
    184 Aufrufe
    Niemand hat geantwortet