Skip to content

ASRock N100M

Linux

  • ASRock N100DC-ITX

    Angeheftet Linux
    2
    0 Stimmen
    2 Beiträge
    2k Aufrufe
    FrankMF
    NVMe

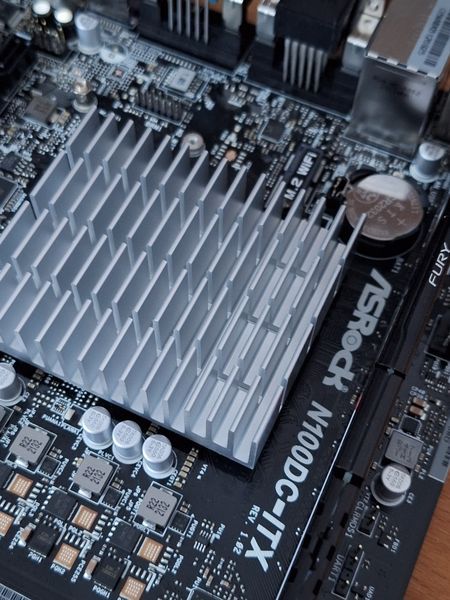
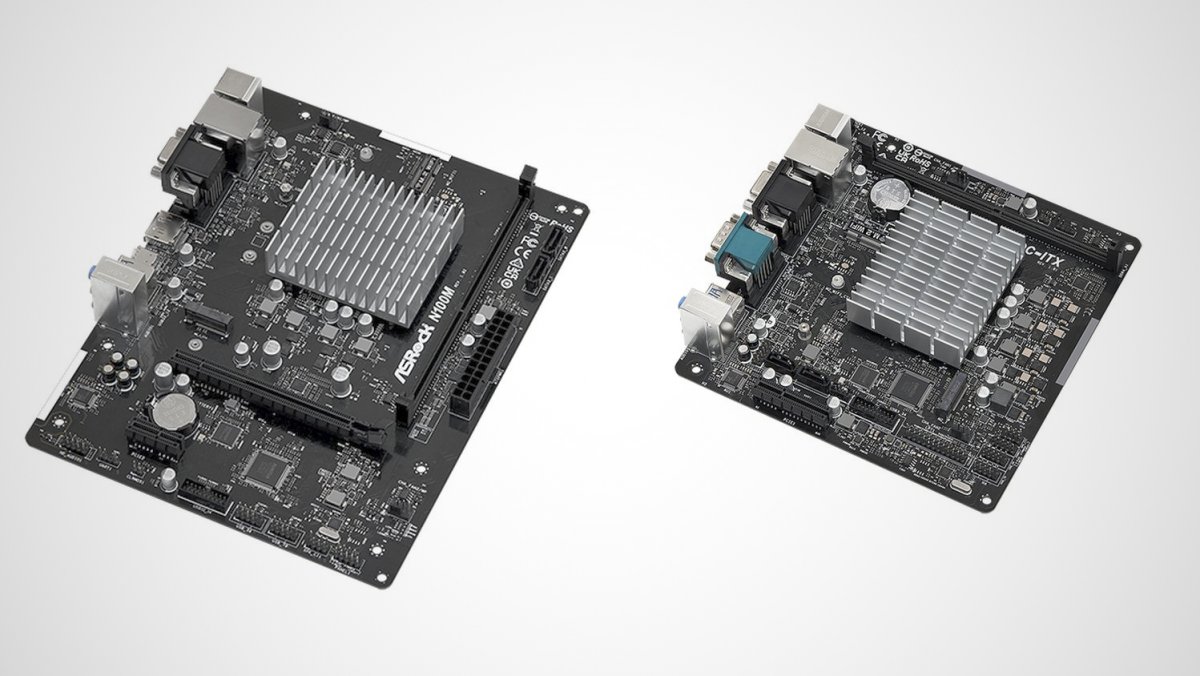
    Die NVMe (Crucial P3 mit 500GB) ist, wenn ich das richtig verstehe, nur mit zwei Lanes an die CPU angebunden. Das macht dann

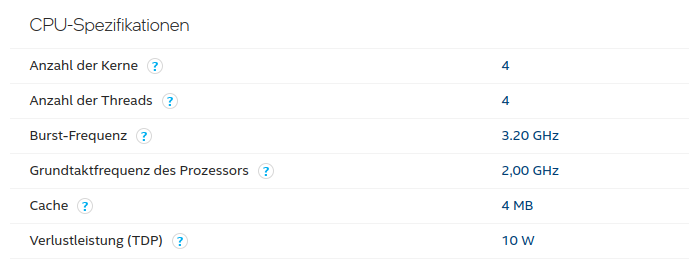
    root@asrock:~# dd if=/dev/zero of=test.img bs=1M count=4096 conv=fdatasync 4096+0 records in 4096+0 records out 4294967296 bytes (4.3 GB, 4.0 GiB) copied, 3.9673 s, 1.1 GB/s Frequenzen root@asrock:/sys/devices/system/cpu/cpu0/cpufreq# cat cpuinfo_min_freq 700000 root@asrock:/sys/devices/system/cpu/cpu0/cpufreq# cat cpuinfo_max_freq 3400000

    Aktuelle cpufreq

    analyzing CPU 3: driver: intel_pstate CPUs which run at the same hardware frequency: 3 CPUs which need to have their frequency coordinated by software: 3 maximum transition latency: 4294.55 ms. hardware limits: 700 MHz - 3.40 GHz available cpufreq governors: performance, powersave current policy: frequency should be within 700 MHz and 3.40 GHz. The governor "performance" may decide which speed to use within this range. current CPU frequency is 800 MHz.

    oder auch

    analyzing CPU 3: driver: intel_pstate CPUs which run at the same hardware frequency: 3 CPUs which need to have their frequency coordinated by software: 3 maximum transition latency: 4294.55 ms. hardware limits: 700 MHz - 3.40 GHz available cpufreq governors: performance, powersave current policy: frequency should be within 700 MHz and 3.40 GHz. The governor "performance" may decide which speed to use within this range. current CPU frequency is 1.63 GHz. iperf3 root@asrock:/sys/devices/system/cpu/cpu0/cpufreq# iperf3 -s ----------------------------------------------------------- Server listening on 5201 (test #1) ----------------------------------------------------------- Accepted connection from 192.168.3.213, port 50746 [ 5] local 192.168.4.7 port 5201 connected to 192.168.3.213 port 50750 [ ID] Interval Transfer Bitrate [ 5] 0.00-1.00 sec 112 MBytes 938 Mbits/sec [ 5] 1.00-2.00 sec 112 MBytes 941 Mbits/sec [ 5] 2.00-3.00 sec 112 MBytes 942 Mbits/sec [ 5] 3.00-4.00 sec 112 MBytes 940 Mbits/sec [ 5] 4.00-5.00 sec 112 MBytes 941 Mbits/sec [ 5] 5.00-6.00 sec 112 MBytes 941 Mbits/sec [ 5] 6.00-7.00 sec 112 MBytes 941 Mbits/sec [ 5] 7.00-8.00 sec 112 MBytes 941 Mbits/sec [ 5] 8.00-9.00 sec 112 MBytes 941 Mbits/sec [ 5] 9.00-10.00 sec 112 MBytes 939 Mbits/sec [ 5] 10.00-10.01 sec 547 KBytes 885 Mbits/sec - - - - - - - - - - - - - - - - - - - - - - - - - [ ID] Interval Transfer Bitrate [ 5] 0.00-10.01 sec 1.10 GBytes 941 Mbits/sec receiver ----------------------------------------------------------- Server listening on 5201 (test #2) ----------------------------------------------------------- Accepted connection from 192.168.3.213, port 33692 [ 5] local 192.168.4.7 port 5201 connected to 192.168.3.213 port 33694 [ ID] Interval Transfer Bitrate Retr Cwnd [ 5] 0.00-1.00 sec 114 MBytes 959 Mbits/sec 0 600 KBytes [ 5] 1.00-2.00 sec 112 MBytes 939 Mbits/sec 0 628 KBytes [ 5] 2.00-3.00 sec 113 MBytes 948 Mbits/sec 0 659 KBytes [ 5] 3.00-4.00 sec 111 MBytes 933 Mbits/sec 0 768 KBytes [ 5] 4.00-5.00 sec 112 MBytes 944 Mbits/sec 0 768 KBytes [ 5] 5.00-6.00 sec 112 MBytes 944 Mbits/sec 0 768 KBytes [ 5] 6.00-7.00 sec 112 MBytes 944 Mbits/sec 0 768 KBytes [ 5] 7.00-8.00 sec 112 MBytes 944 Mbits/sec 0 768 KBytes [ 5] 8.00-9.00 sec 111 MBytes 933 Mbits/sec 0 823 KBytes [ 5] 9.00-10.00 sec 112 MBytes 944 Mbits/sec 0 823 KBytes - - - - - - - - - - - - - - - - - - - - - - - - - [ ID] Interval Transfer Bitrate Retr [ 5] 0.00-10.00 sec 1.10 GBytes 943 Mbits/sec 0 sender
  • NAS 2023 - Thema Datensicherung

    Verschoben Linux
    2
    0 Stimmen
    2 Beiträge
    120 Aufrufe
    FrankMF

    Bleibt noch etwas wichtiges. Die ganzen Konfigurationsdateien vom Proxmox Host. Sinnvoll, das man sich das sichert.

    #!/bin/bash # Script um mit Restic Daten automatisiert zu sichern! # Dient zum Sichern des Ordners /etc/pve! # Was soll gesichert werden? backup_pfad=/etc/pve # Programm Start restic --password-file /root/passwd -r /mnt/pve/Restic_Backups/pve backup $backup_pfad > backup_pve_001.log restic --password-file /root/passwd -r /mnt/pve/Restic_Backups/pve forget --keep-last 3 --keep-monthly 3 --prune >> backup_pve_002.log # Testen restic --password-file /root/passwd -r /mnt/pve/Restic_Backups/pve check --read-data >> backup_pve_003.log

    Crontab eingerichtet - fertig!

  • NAS 2023 - Software Teil 2

    Angeheftet Verschoben Linux
    1
    0 Stimmen
    1 Beiträge
    158 Aufrufe
    Niemand hat geantwortet
  • Mail vom NAS verschicken

    Verschoben Linux
    1
    0 Stimmen
    1 Beiträge
    570 Aufrufe
    Niemand hat geantwortet
  • NAS - Cups & Sane

    Linux
    1
    0 Stimmen
    1 Beiträge
    469 Aufrufe
    Niemand hat geantwortet
  • SATA Karte Marvell 88SE9230 Chipsatz

    Angeheftet Hardware
    19
    0 Stimmen
    19 Beiträge
    6k Aufrufe
    FrankMF

    Ok, es gibt noch eine andere Möglichkeit.

    Kamil hat mir noch ein wenig geholfen. Mit folgender Änderung werden die Platten gefunden.

    hmm, I had to add /etc/default/extlinux: libahci.skip_host_reset=1

    Sieht dann so aus.

    # Configure timeout to choose the kernel # TIMEOUT="10" # Configure default kernel to boot: check all kernels in `/boot/extlinux/extlinux.conf` # DEFAULT="kernel-4.4.126-rockchip-ayufan-253" # Configure additional kernel configuration options APPEND="$APPEND root=LABEL=linux-root rootwait rootfstype=ext4 libahci.skip_host_reset=1"

    Danach waren die Platten zu sehen.

    root@rockpro64:/tmp/etc/default# blkid /dev/sda2: SEC_TYPE="msdos" LABEL_FATBOOT="boot-efi" LABEL="boot-efi" UUID="ABCD-FC7D" TYPE="vfat" PARTLABEL="boot_efi" PARTUUID="72e36967-4050-4bb3-8f8f-bf6755c38f28" /dev/sda3: LABEL="linux-boot" UUID="8e289a3e-0f9b-4da1-a147-51e03390637c" TYPE="ext4" PARTLABEL="linux_boot" PARTUUID="fe944fd2-3e42-4202-8a95-656e9bdb4be6" /dev/sda4: LABEL="linux-root" UUID="3e9513c6-dfd1-48c9-bee2-04bb5a153056" TYPE="ext4" PARTLABEL="linux_root" PARTUUID="d2d1dd88-030d-4f74-998f-7c9ce7d385d0" /dev/sdb2: SEC_TYPE="msdos" LABEL_FATBOOT="boot-efi" LABEL="boot-efi" UUID="56C9-F745" TYPE="vfat" PARTLABEL="boot_efi" PARTUUID="919c8f73-5f25-4a01-9072-3a5ed9a88ff2" /dev/sdb3: LABEL="linux-boot" UUID="23c19647-f4a1-4197-a877-f1bb03456bef" TYPE="ext4" PARTLABEL="linux_boot" PARTUUID="093d0cc0-d122-4dce-aeb5-4e266b4b7d9d" /dev/sdb4: LABEL="linux-root" UUID="f1c74331-8318-4ee8-a4f7-f0c169fb9944" TYPE="ext4" PARTLABEL="linux_root" PARTUUID="964ab457-58d5-40c4-bb02-dfd37bd2f0da" /dev/sda1: PARTLABEL="loader1" PARTUUID="37466429-e4a4-495c-b9a1-3f74625a3cae" /dev/sdb1: PARTLABEL="loader1" PARTUUID="33f692b3-54cb-4a37-b602-21a2baf32fa0"

    Aber auch hiermit ist ein Boot von der SATA Platte nicht möglich.

    Ich möchte hier noch was vom kamil zitieren.

    (11:44:09) ayufanWithPM: will look later, but this controller is tricky, also on x86 as well
    (11:44:16) ayufanWithPM: jms585 seems to be significantly more stable

    Evt. bekommt er das gefixt 😉

  • 0 Stimmen
    2 Beiträge
    712 Aufrufe
    FrankMF

    Neue Artikel im Pine64 Shop

    ABS Gehäuse https://www.pine64.org/?product=rockpro64-abs-enclosure Gehäuse für einen ROCKPro64 und einen LCD-Bildschirm https://www.pine64.org/?product=rockpro64-playbox-enclosure
  • Recover Button

    Hardware
    2
    0 Stimmen
    2 Beiträge
    794 Aufrufe
    FrankMF

    Ich hab das mal ausprobiert.

    Den Recover Button so lange drücken, bis folgendes erscheint.

    In: serial@ff1a0000 Out: serial@ff1a0000 Err: serial@ff1a0000 Model: Pine64 RockPro64 rockchip_dnl_mode = 1 mode rockchip_dnl_mode = 2 mode rockchip_dnl_mode = 3 mode rockchip_dnl_mode = 4 mode entering maskrom mode...

    RKFlashTool clonen

    root@thinkpad:/home/frank/test# git clone https://github.com/rockchip-linux/rkflashtool Klone nach 'rkflashtool' ... remote: Counting objects: 663, done. remote: Total 663 (delta 0), reused 0 (delta 0), pack-reused 663 Empfange Objekte: 100% (663/663), 114.94 KiB | 0 bytes/s, Fertig. Löse Unterschiede auf: 100% (367/367), Fertig.

    In das Verzeichnis wechseln

    root@thinkpad:/home/frank/test# cd rkflashtool/

    Inhalt

    root@thinkpad:/home/frank/test/rkflashtool# ls doc Makefile rkcrc.h rkflashtool.h rkparametersblock examples README rkflashall rkmisc rkunpack.c fixversion.sh release.sh rkflashloader rkpad rkunsign flashuboot rkcrc.c rkflashtool.c rkparameters version.h

    RKFlashtool bauen

    root@thinkpad:/home/frank/test/rkflashtool# make gcc -O2 -W -Wall -I/usr/include/libusb-1.0 rkflashtool.c -o rkflashtool -lusb-1.0 gcc -O2 -W -Wall -I/usr/include/libusb-1.0 rkcrc.c -o rkcrc -lusb-1.0 gcc -O2 -W -Wall -I/usr/include/libusb-1.0 rkunpack.c -o rkunpack -lusb-1.0

    Ich habe ein USB-A to USB-A Kabel vom USB-C Port des ROCKPro64 zu meinem Notebook hergestellt.

    root@thinkpad:/home/frank/test/rkflashtool# sudo ./rkflashtool v rkflashtool: info: rkflashtool v5.2 rkflashtool: info: Detected RK3399... rkflashtool: info: interface claimed rkflashtool: info: MASK ROM MODE rkflashtool: info: chip version: -..-

    Ok, Verbindung steht.

    Eine Übersicht der Befehle

    root@thinkpad:/home/frank/test/rkflashtool# sudo ./rkflashtool rkflashtool: info: rkflashtool v5.2 rkflashtool: fatal: usage: rkflashtool b [flag] reboot device rkflashtool l <file load DDR init (MASK ROM MODE) rkflashtool L <file load USB loader (MASK ROM MODE) rkflashtool v read chip version rkflashtool n read NAND flash info rkflashtool i offset nsectors >outfile read IDBlocks rkflashtool j offset nsectors <infile write IDBlocks rkflashtool m offset nbytes >outfile read SDRAM rkflashtool M offset nbytes <infile write SDRAM rkflashtool B krnl_addr parm_addr exec SDRAM rkflashtool r partname >outfile read flash partition rkflashtool w partname <infile write flash partition rkflashtool r offset nsectors >outfile read flash rkflashtool w offset nsectors <infile write flash rkflashtool p >file fetch parameters rkflashtool P <file write parameters rkflashtool e partname erase flash (fill with 0xff) rkflashtool e offset nsectors erase flash (fill with 0xff)