Skip to content

Quartz64 - Model B

Angeheftet Verschoben Quartz64 - B
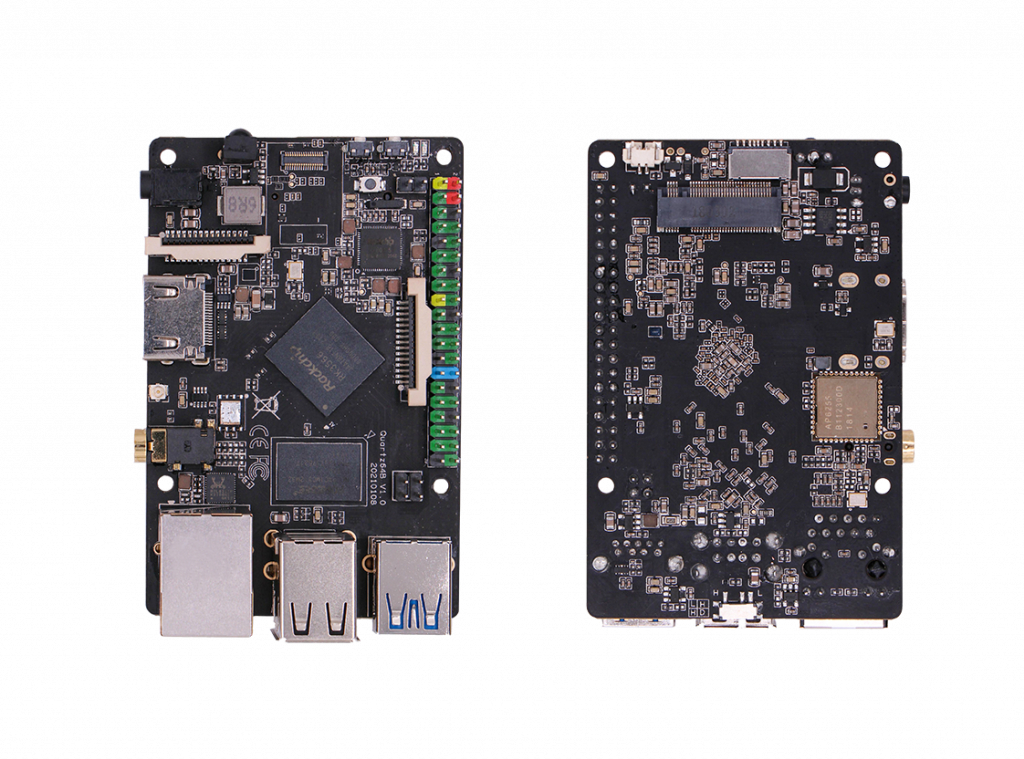
  • Quartz64_model_b.png
    Bildquelle: https://www.pine64.org/quartz64b/

    5V-Stromversorgung!

    SoC and Memory Specification

    CPU Architecture

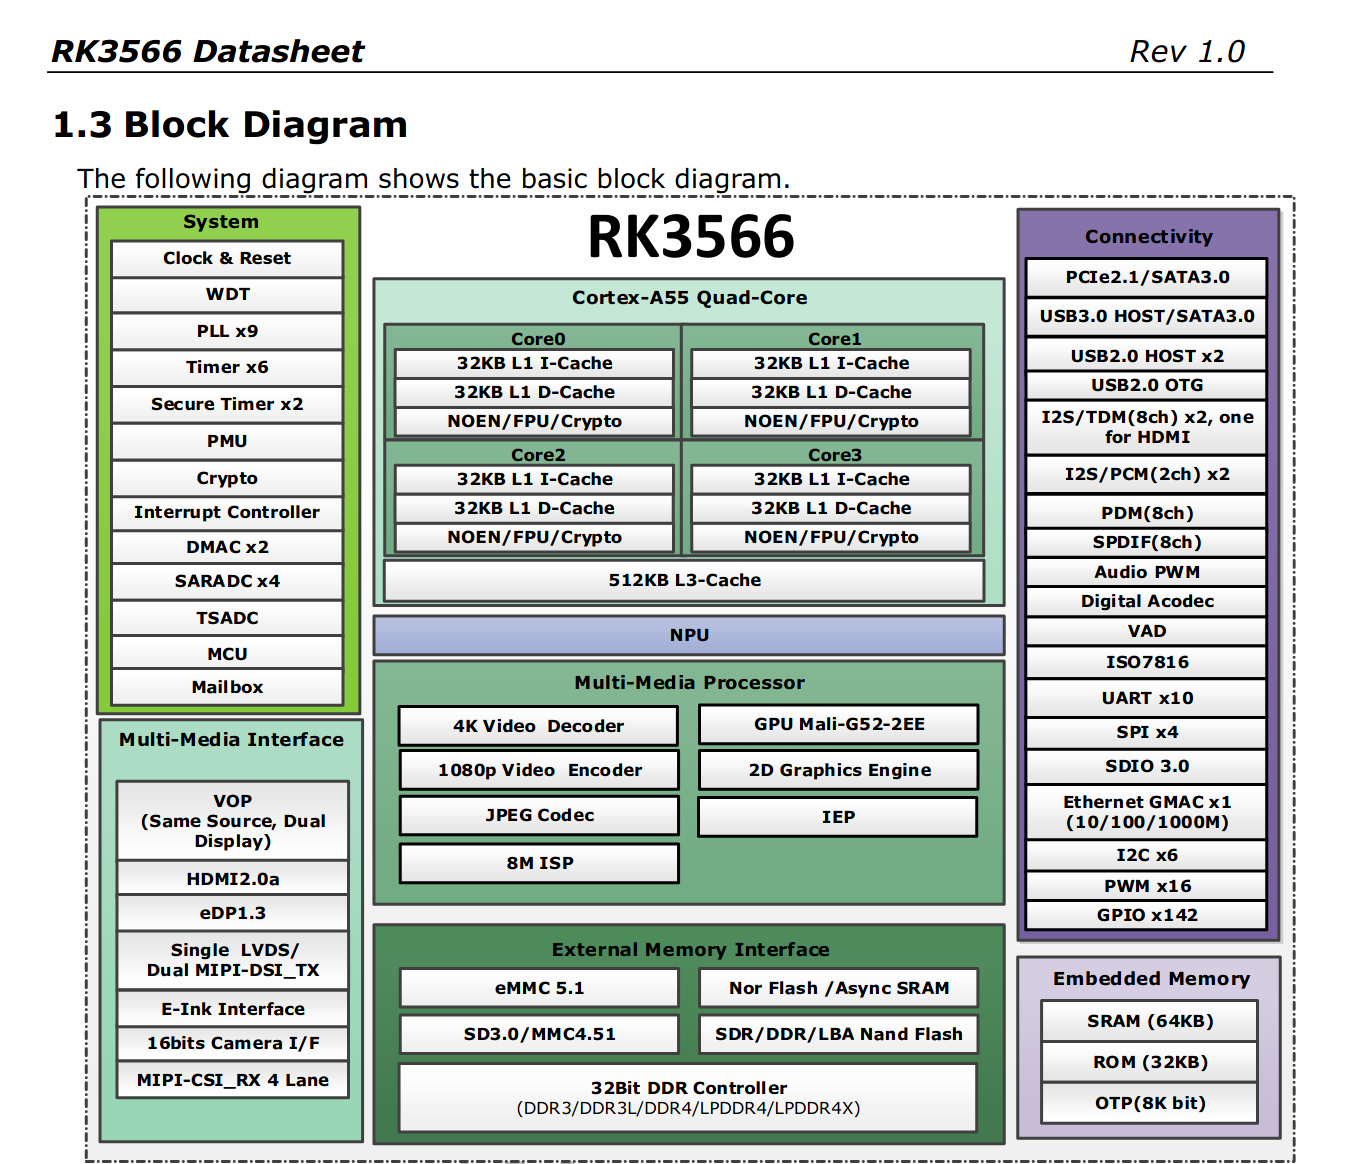
    • Quad-core ARM Cortex-A55@1.8GHz
    • AArch32 for full backwards compatibility with ARMv7
    • ARM Neon Advanced SIMD (single instruction, multiple data) support for accelerated media and signal processing computation
    • Includes VFP hardware to support single and double-precision operations
    • ARMv8 Cryptography Extensions
    • Integrated 32KB L1 instruction cache and 32KB L1 data cache per core
    • 512KB unified system L3 cache
    • TrustZone technology support

    Graphic Process Unit GPU Capability

    • Mali-G52 2EE Bifrost GPU@800MHz
    • 4x Multi-Sampling Anti-Aliasing (MSAA) with minimal performance drop
    • 128KB L2 Cache configurations
    • Supports OpenGL ES 1.1, 2.0, and 3.2
    • Supports Vulkan 1.0 and 1.1
    • Supports OpenCL 2.0 Full Profile
    • Supports 1600 Mpix/s fill rate when at 800MHz clock frequency
    • Supports 38.4 GLOP/s when at 800MHz clock frequency

    Neural Process Unit NPU Capability

    • Neural network acceleration engine with processing performance of up to 0.8 TOPS
    • Supports integer 8 and integer 16 convolution operations
    • Supports the following deep learning frameworks: TensorFlow, TF-lite, Pytorch, Caffe, ONNX, MXNet, Keras, Darknet

    System Memory

    • RAM Memory Variants: 2GB - 8GB LPDDR4.
    • SPI Flash: 128Mbit / 16MByte

    Network

    • 10/100/1000Mbps Ethernet
    • WiFi 802.11 b/g/n/ac with Bluetooth 5.0 (optional on model A, build in on model B)

    Storage

    • microSD - bootable, supports SDHC and SDXC, storage up to 2TB
    • USB - 2 ports on model B, 3 ports on model A USB 2.0 Host port, 1 USB 3.0 Host port
    • one native SATA 3.0 6Gb/s Port (only on model A, shared with USB 3.0 host port)
    • optional eMMC module from 16GB up to 128GB

    Expansion Ports

    • eDP - 4 lanes of 2.7Gbps, up to 2560x1600@60Hz (only on model A)
    • DSI - Display Serial Interface, 4 lanes MiPi, up to 1440P on model A, 2 lanes MiPi, up to 1080p on model B
    • CSI - CMOS Camera Interface, 4 lanes MiPi up to 8 mega pixel on model A, 2 lanes MiPi up to 5 mega pixel on model B
    • TP - Touch Panel Port, SPI with interrupt on model A
    • RTC - Real Time Clock Battery Connector
    • VBAT - Lithium Battery Connector with temperature sensor input on model A
    • Wifi/BT Module Header - SDIO 3.0 and UART on model A, build in Wifi/BT Module on model B
    • 2x20 pins "Pi2" GPIO Header on model B, 2x10 pins GPO header on model A
    • PCIe x4 open ended slot on model A, m.2 slot on model B, one Gen2 lane due to SoC constraints

    Quartz64 board Information, Schematics, and Certifications

    Quelle: https://wiki.pine64.org/wiki/Quartz64

  • Neuigkeiten zum WiFi-Modul, was auf dem Model B verbaut ist.

    <@tl_lim> The Quartz64 model B product version will comes with BL602 module instead of AP6255.

    Das macht nur 2,4 GHz 😞

    Dokumentation

  • FrankMF FrankM hat am auf dieses Thema verwiesen
  • FrankMF FrankM hat dieses Thema am angepinnt
  • Da mein Model B ja bestellt ist, bin ich gerade über einen Post gestolpert.

    <CounterPillow> "Model A" is the big form factor, "Model B" the small form factor. Model A boards generally use 12V, Model B boards use 5V.

    Da sollte man also höllisch aufpassen, wenn man beide auf dem Schreibtisch liegen hat. Da ist schnell mal ein B gegrillt, wenn man das falsche Netzteil erwischt.

    Blödsinn! Beim Quartz64 - Modell A ist der Stecker

    DC 12V @ 3A 5.5mmOD/2.1mmID center-positive Barrel DC Jack connector

    beim Quartz64 - Modell B

    DC 5V @ 3A 3.5mmOD/1.35mmID center-positive Barrel DC Jack connector

    Passt also nicht, also alles safe 🙂

    Der Schaltplan soll nächste Woche veröffentlicht werden.

    CounterPillow hat mal nachgemessen

    <CounterPillow> just checked with with multimeter, it is center positive

  • Da schreibt mich das Sales Team von pine64.org an teilt mir mit, das meine PLZ falsch ist. Ja, ein scheiß Tippfehler....... Er wäre schon da 😞

  • Das ging diesmal flott. Nachricht von FedEx, Lieferung soll bis zum 02.06 da sein 🤓

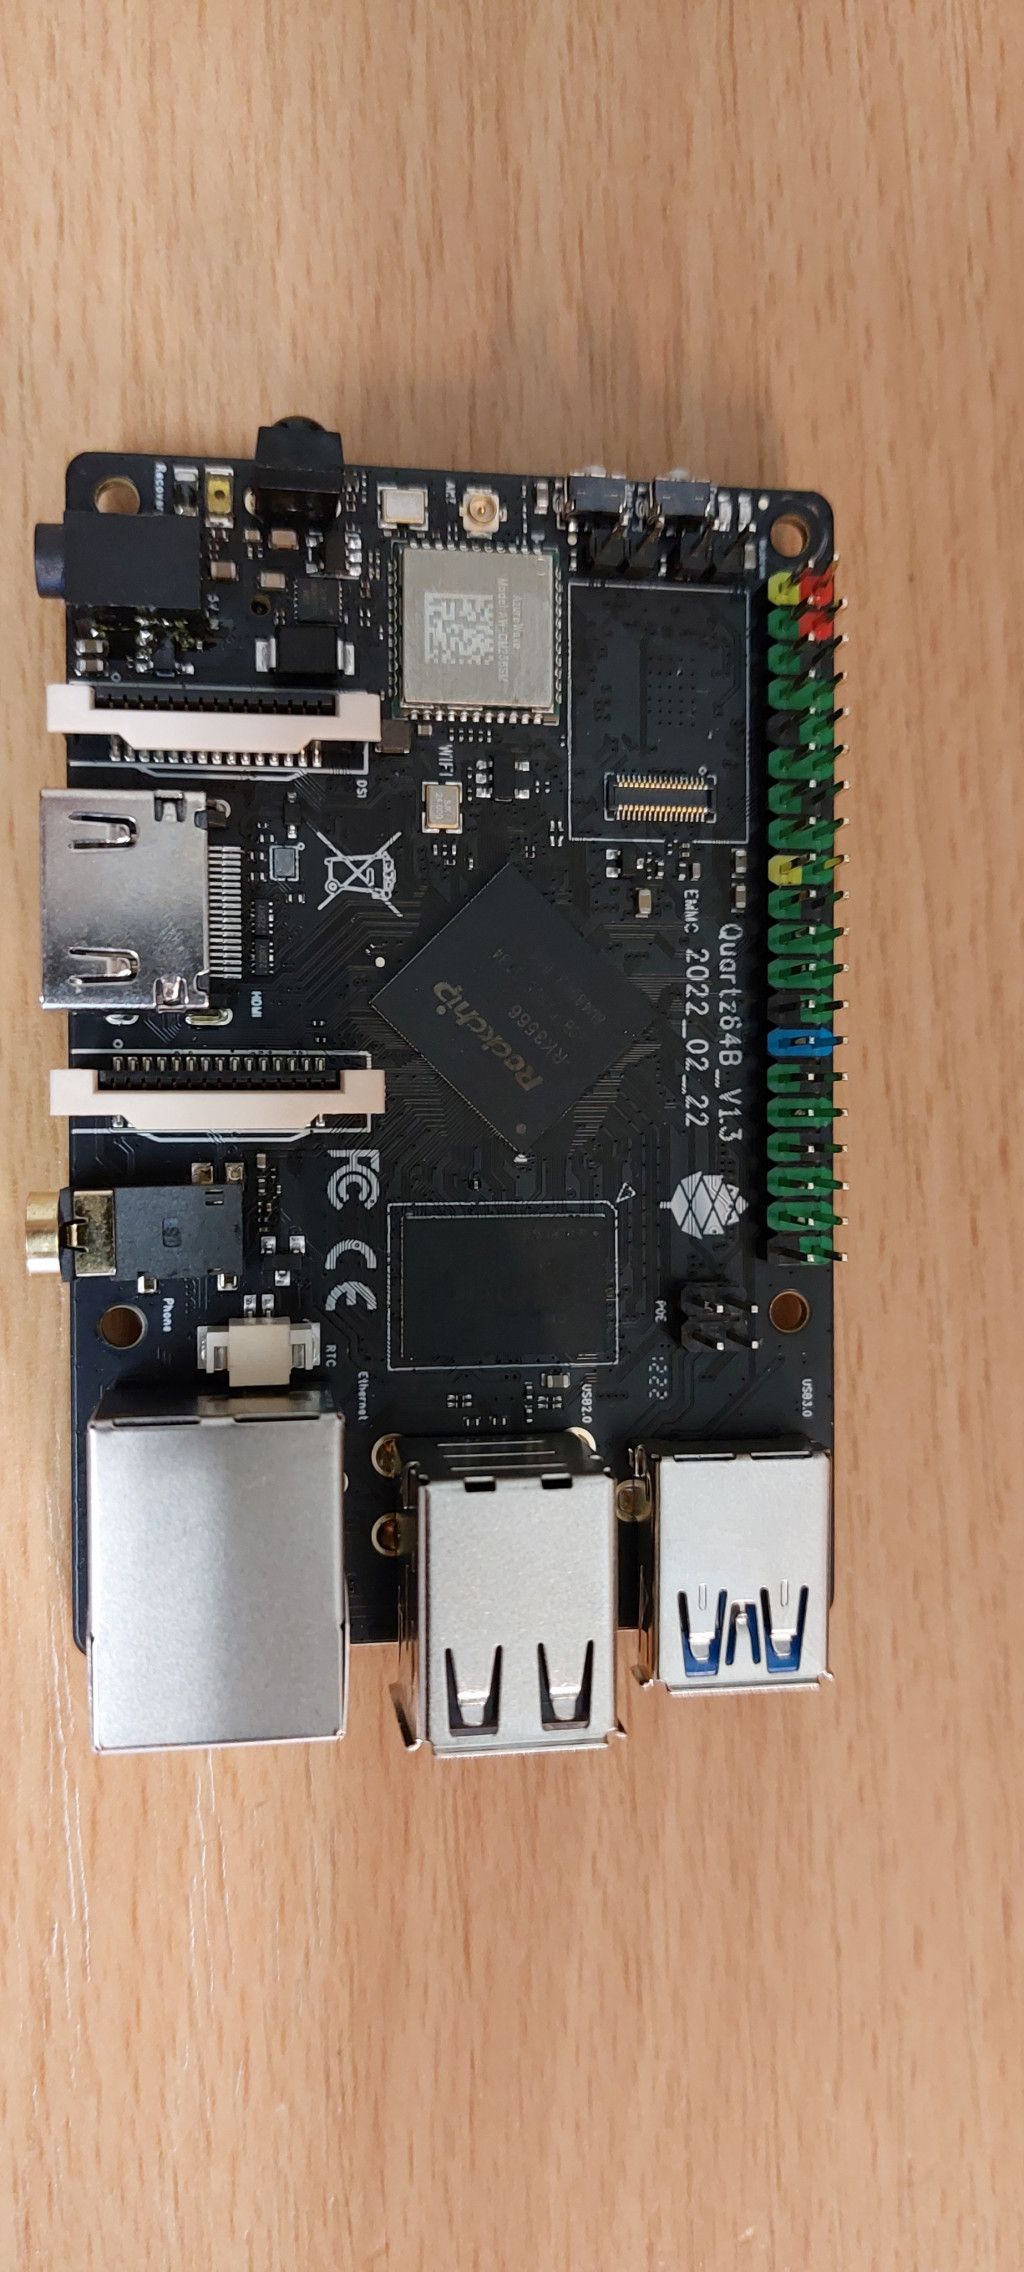
  • Er ist angekommen.

    20210625_163934.jpg

    1024-2272.jpg

    Leider funktioniert der UART Adapter nicht, jede Menge Artefakte 😞

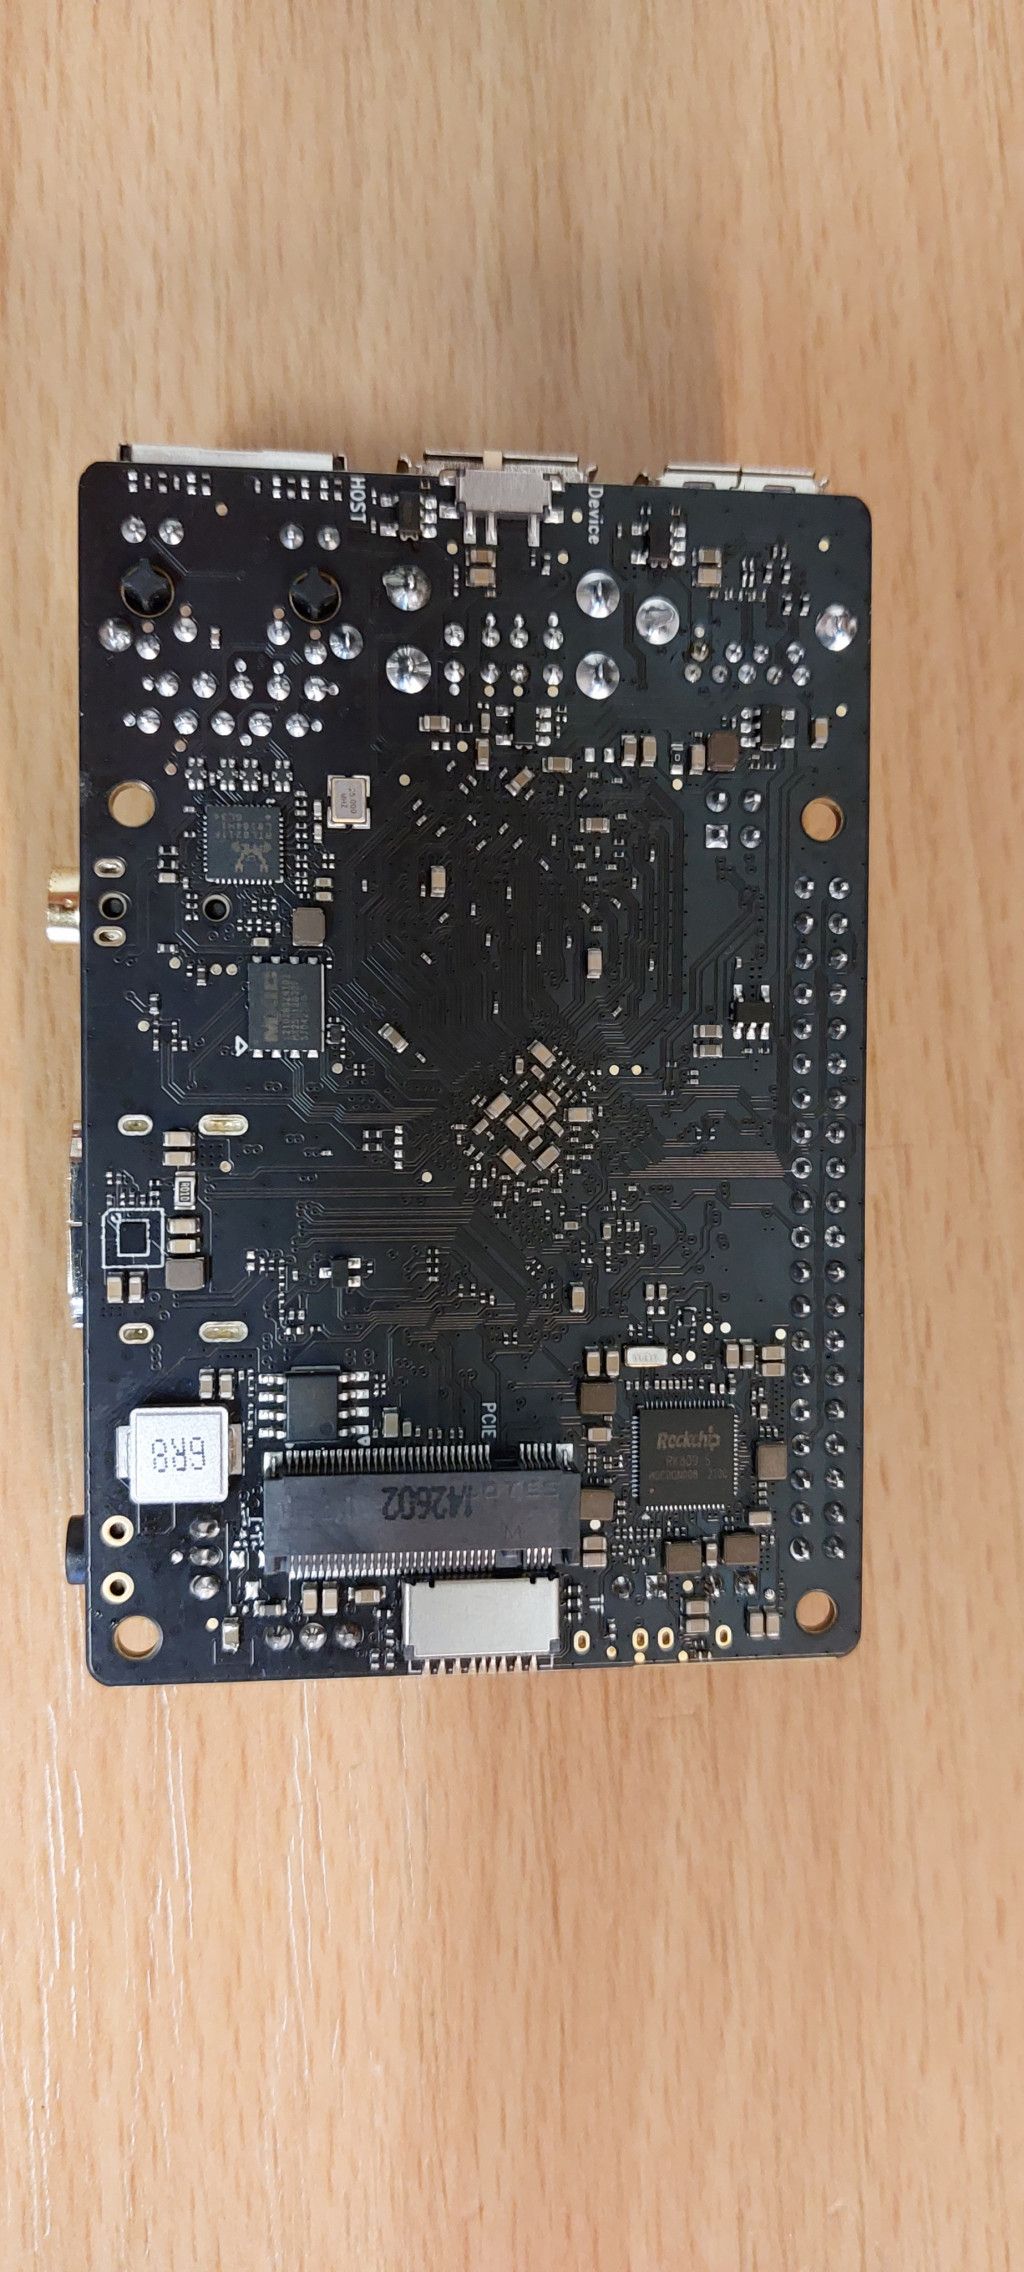
    Ein paar Neue sind bestellt und hoffentlich morgen da. Das alte Spielkind, konnte es aber nicht lassen und musste unbedingt schauen ob der M2-Slot funktioniert.

    1024-227245.jpg

    Bildschirmfoto vom 2022-06-01 19-04-26.png

    Ok, das macht natürlich NULL Spaß, also geht es morgen weiter...

  • FrankMF FrankM verschob dieses Thema von Hardware am
  • Heute die Zollrechnung von FedEx 16,47€

  • Quartz64 - Heartbeat LED

    Quartz64
    1
    0 Stimmen
    1 Beiträge
    45 Aufrufe
    Niemand hat geantwortet
  • Quartz64 - Modell B - WiFi

    Quartz64 - B
    1
    0 Stimmen
    1 Beiträge
    163 Aufrufe
    Niemand hat geantwortet
  • Qurtz64 - Modell B - GPIO

    Quartz64 - B
    1
    0 Stimmen
    1 Beiträge
    76 Aufrufe
    Niemand hat geantwortet
  • Quartz64 - Modell B - UART

    Angeheftet Quartz64 - B
    4
    0 Stimmen
    4 Beiträge
    171 Aufrufe
    FrankMF

    Um das hier zu komplettieren, habe ich mich gerade gefragt "Wo speichert er die Settings?"

    Ok, ich habe sie gefunden.

    /root/.minirc.dfl

    Inhalt

    # Diese Datei ist maschinell erzeugt. Bitte verwenden Sie das # Einstellungs-Menü im minicom-Programm, um die Einstellungen # zu ändern. pu rtscts No

    Jetzt habe ich ausreichend hier dokumentiert, falls ich da nochmal Probleme mit habe.

  • Quartz64 - Missing SPI ?

    Verschoben Quartz64
    1
    0 Stimmen
    1 Beiträge
    403 Aufrufe
    Niemand hat geantwortet
  • Quartz64 - Manjaro Image Aktuell!

    Images
    8
    0 Stimmen
    8 Beiträge
    319 Aufrufe
    FrankMF

    Gestern hatte ich nach langer Zeit mal wieder das Bedürfnis zu schauen, was Manjaro so macht 😉

    Dieses Image habe ich ausgewählt. Manjaro-ARM-kde-plasma-quartz64-a-20220418.img.xz

    Nach der Installation bemerkt, das jetzt beim Login steht, das man eine Wayland Session startet 😍

    20220421_205322.jpg

    Man merkt dem KDE Plasma direkt an, das er wesentlich weniger Latenzen hat, als das olle X11. Ich musste dann dem Dan wieder auf die Nerven gehen, weil ich doch von dem Thema Grafik, 3D-Beschleunigung usw. NULL Ahnung habe. Er meinte dann zu mir, das Panfrost mittlerweile aktiv ist. Panfrost?

    Schauen wir mal nach. https://docs.mesa3d.org/drivers/panfrost.html

    The Panfrost driver stack includes an OpenGL ES implementation for Arm Mali GPUs based on the Midgard and Bifrost microarchitectures.

    Im Quartz64 ist folgende GPU verbaut

    Mali-G52 2EE Bifrost GPU@800MHz

    Diese wird von Panfrost unterstützt.

    Jetzt stand da noch OpenGLS ES, was ist das?

    OpenGL for Embedded Systems (OpenGL ES or GLES) is a subset[2] of the OpenGL computer graphics rendering application programming interface (API) for rendering 2D and 3D computer graphics such as those used by video games, typically hardware-accelerated using a graphics processing unit (GPU).
    Quelle: https://en.wikipedia.org/wiki/OpenGL_ES

    Ich habe dann mal geschaut, wie man Panfrost testen kann. Hier bin ich gelandet.

    Ich habe zwei Test gemacht, einmal mit X11 und das andere Mal mit Wayland. Von dem X11 Test habe ich ein kleines Video angefertigt.

    Am Ende könnt ihr den glmark Score erkennen 112

    Und hier mal das Ergebnis mit Wayland 365 Ich würde jetzt als Noob sagen, Wayland ist 3,3 mal schneller. Da ich aber eingangs schon erwähnte, das ich von dem Thema keine Ahnung habe, überlasse ich den Menschen mit Fachkenntnissen die Einschätzung.

    2022-04-21_20-49.png

    Mein subjektiver Eindruck ist, Wayland läuft wesentlich besser. Das habe ich auch auf meinem Haupt-PC schon festgestellt. Vor allen Dingen die Latenz ist um ein vielfaches besser. Aber wir dürfen auch nicht verschweigen, bei Wayland geht vieles noch immer nicht. Zum Beispiel konnte ich das Video nur auf X11 mit SimpleScreenRecorder machen.

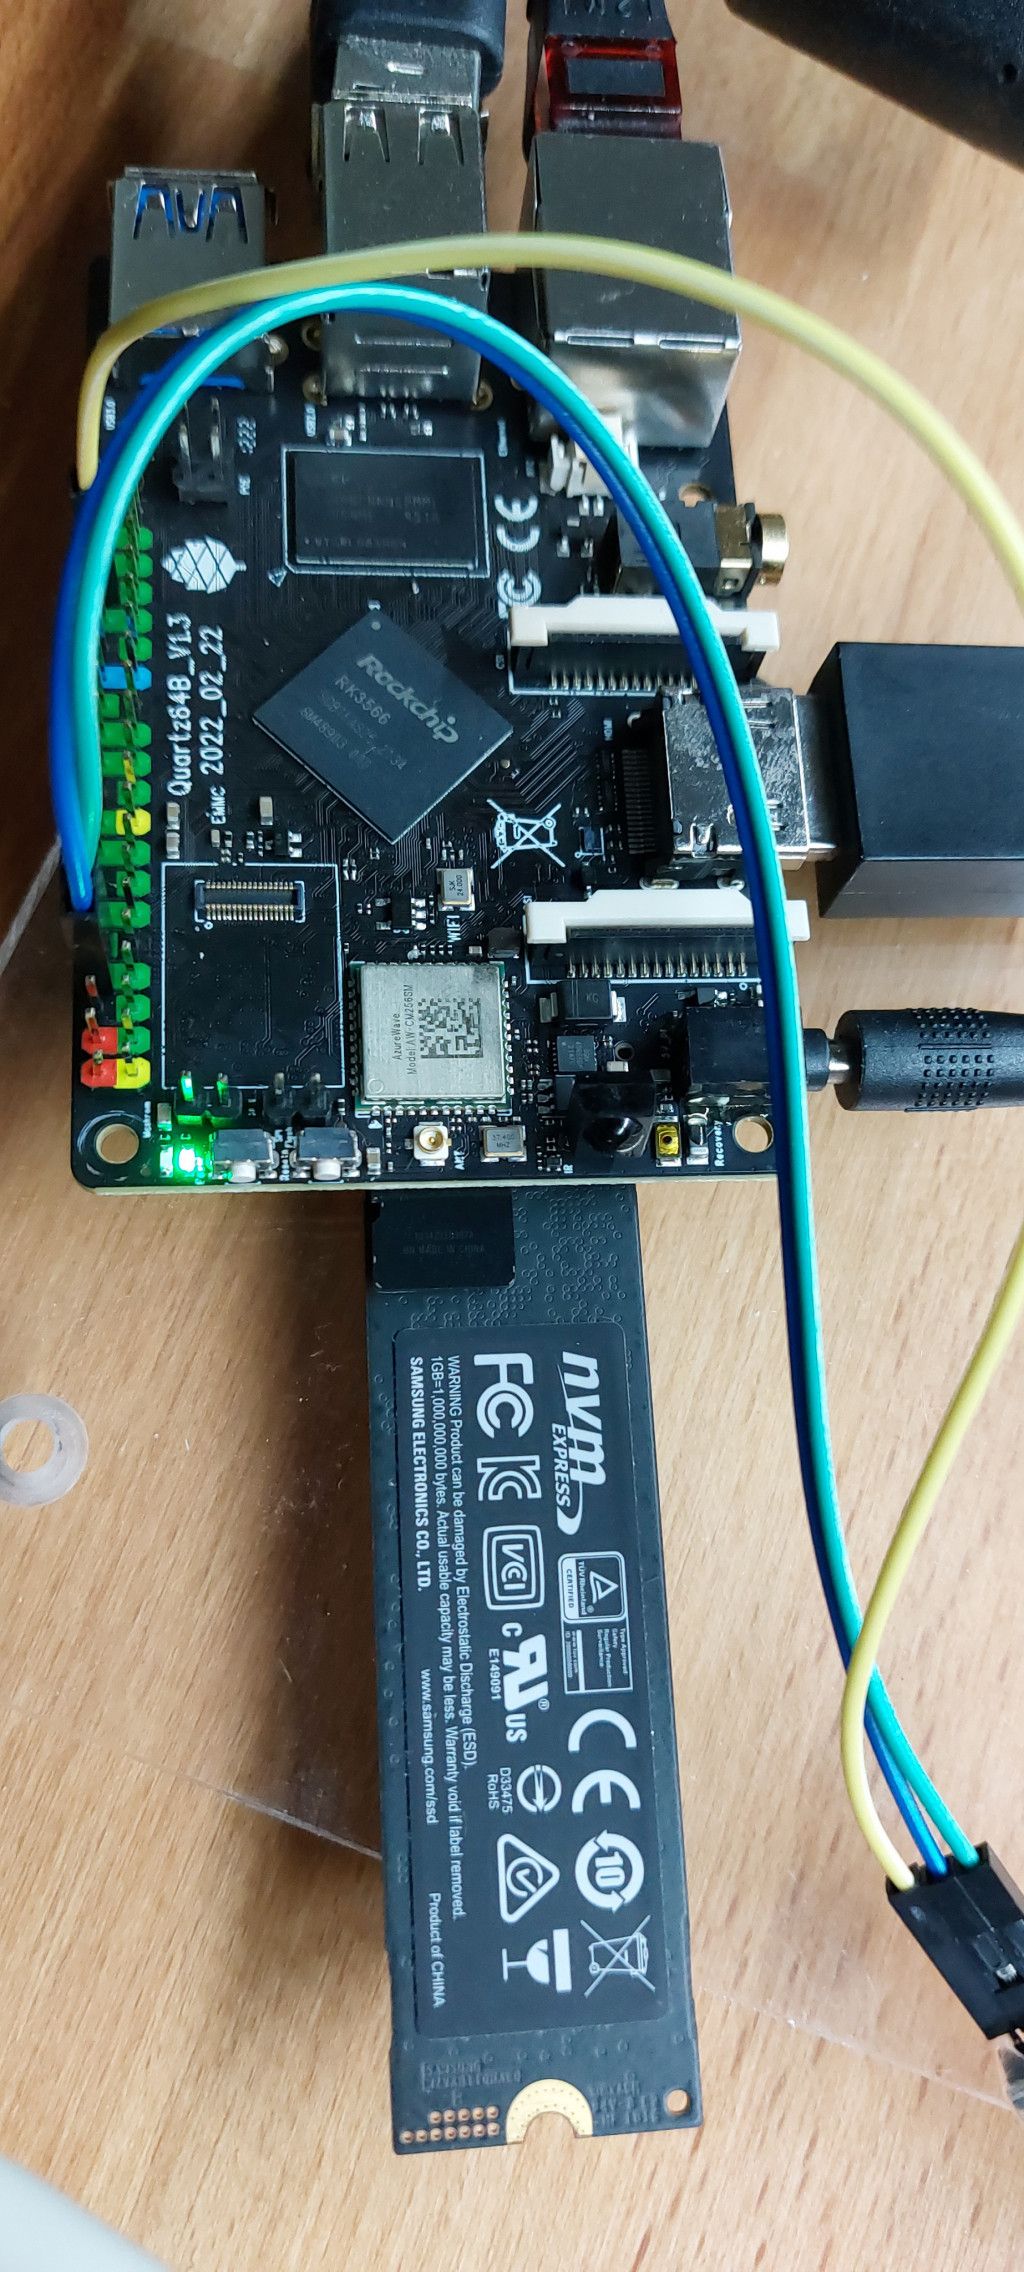
    Leider sind wir immer noch nicht an dem Punkt, wo z.B. Youtube Videos im FF einwandfrei laufen. Von der HArdware Unterstützung brauchen wir auch nicht zu sprechen, da geht immer noch nicht so richtig viel. Die PCIe Schnittstelle habe ich noch kurz mit einer NVMe getestet.

    [frank@frank-pc e5f97e94-0e45-4fa6-b8fb-373e35c708f8]$ iozone -e -I -a -s 100M -r 4k -r 16k -r 512k -r 1024k -r 16384k -i 0 -i 1 -i 2 Iozone: Performance Test of File I/O Version $Revision: 3.489 $ Compiled for 64 bit mode. Build: linux Contributors:William Norcott, Don Capps, Isom Crawford, Kirby Collins Al Slater, Scott Rhine, Mike Wisner, Ken Goss Steve Landherr, Brad Smith, Mark Kelly, Dr. Alain CYR, Randy Dunlap, Mark Montague, Dan Million, Gavin Brebner, Jean-Marc Zucconi, Jeff Blomberg, Benny Halevy, Dave Boone, Erik Habbinga, Kris Strecker, Walter Wong, Joshua Root, Fabrice Bacchella, Zhenghua Xue, Qin Li, Darren Sawyer, Vangel Bojaxhi, Ben England, Vikentsi Lapa, Alexey Skidanov, Sudhir Kumar. Run began: Thu Apr 21 21:49:06 2022 Include fsync in write timing O_DIRECT feature enabled Auto Mode File size set to 102400 kB Record Size 4 kB Record Size 16 kB Record Size 512 kB Record Size 1024 kB Record Size 16384 kB Command line used: iozone -e -I -a -s 100M -r 4k -r 16k -r 512k -r 1024k -r 16384k -i 0 -i 1 -i 2 Output is in kBytes/sec Time Resolution = 0.000001 seconds. Processor cache size set to 1024 kBytes. Processor cache line size set to 32 bytes. File stride size set to 17 * record size. random random bkwd record stride kB reclen write rewrite read reread read write read rewrite read fwrite frewrite fread freread 102400 4 53221 74745 76900 77656 46983 73982 102400 16 135113 181063 182235 183108 131535 180494 102400 512 354092 361813 357888 362080 351316 361385 102400 1024 368909 373104 374076 378286 372179 372881 102400 16384 384251 378963 376150 377334 376874 377929 iozone test complete.
  • Quartz64 - Wireguard

    Verschoben Quartz64
    1
    0 Stimmen
    1 Beiträge
    223 Aufrufe
    Niemand hat geantwortet
  • Quartz64 - Image von Peter Geis

    Images
    4
    0 Stimmen
    4 Beiträge
    314 Aufrufe
    FrankMF

    Nach langer Zeit habe ich mich mal wieder mit diesem Image beschäftigt. Peter hat da mittlerweile viel dran gearbeitet und jetzt schau ich mal, was so wie funktioniert. Also, das Image wie gewohnt auf eine SD-Karte und starten. Gewählt habe ich dieses Image -> rk3566-quartz64-a.dtb.img

    Wenn man das Image startet, wird man hiermit begrüßt

    screen01.png

    Punkt 1Buildroot-recovery startet ein Minimalsystem, womit man verschiedene Dinge auf der Konsole durchführen kann. Das brauchen wir gleich noch. Punkt 2 startet den Debian Installer Punkt 3 startet ein installiertes Debian von der SD-Karte Punkt 4 startet ein installiertes Debian vom eMMC-Modul

    Ich möchte heute mal schauen, ob man ein Minimal-System auf die PCIe-NVMe-Karte installieren kann. Peter hat nämlich den PCIe-Treiber mittlerweile im Kernel mit eingebaut.

    Dazu starte ich den Debian-Installer und führe die Installation durch. Für mich nichts besonderes, das mache ich ja sehr oft. Nach erfolgreicher Installation startet die Installation nicht, weil Peter in seinem Image das so nicht vorgesehen hat.

    Es gibt mehrere Möglichkeiten, das jetzt zu ändern. Wir machen das über UART direkt auf dem Quartz64.

    Die Struktur von Peters Image sieht so aus.

    e50bf2fe-723c-41f8-acba-227e148374ed-image.png

    Ich gehe nicht auf alles ein, die wichtigsten Partitionen haben einen Namen. Uns interessiert hier die Partition Nummer 5 mit dem Namen efi. (Auf der SD-Karte!!) Der Inhalt

    3c5cbf5f-811d-4c1f-95e9-cd007a37155c-image.png

    Im Ordner extlinux liegt die Konfigurationsdatei, die wir bearbeiten müssen. extlinux.config

    default l0 menu title Quartz64 Installer prompt 0 timeout 50 label l0 menu label Buildroot-recovery linux /vmlinuz initrd /rootfs.cpio.zst fdt /dtbs/rockchip/rk3566-quartz64-a.dtb append earlycon=uart8250,mmio32,0xfe660000 console=ttyS2,1500000n8 label l1 menu label Debian-Installer linux /vmlinuz initrd /initrd.gz fdt /dtbs/rockchip/rk3566-quartz64-a.dtb append earlycon=uart8250,mmio32,0xfe660000 console=ttyS2,1500000n8 label l6 menu label Boot Root SDMMC linux /vmlinuz fdt /dtbs/rockchip/rk3566-quartz64-a.dtb append earlycon=uart8250,mmio32,0xfe660000 console=ttyS2,1500000n8 root=/dev/mmcblk0p7 rootwait label l9 menu label Boot Root eMMC linux /vmlinuz fdt /dtbs/rockchip/rk3566-quartz64-a.dtb append earlycon=uart8250,mmio32,0xfe660000 console=ttyS2,1500000n8 root=/dev/mmcblk1p7 rootwait

    Ich nehme den Eintrag label l9 und passe ihn ein wenig an.

    label l9 menu label Boot Root NVMe linux /dev/nvme0n1p1/vmlinuz fdt /dtbs/rockchip/rk3566-quartz64-a.dtb append earlycon=uart8250,mmio32,0xfe660000 console=ttyS2,1500000n8 root=/dev/nvme0n1p2 rootwait

    Das wird abgespeichert, danach kann man den Quartz64 neustarten und mit Eingabe der Taste 4 startet man dann das Debian von der NVMe SSD.

    root@debian:~# df -h Filesystem Size Used Avail Use% Mounted on /dev/root 457G 926M 432G 1% / devtmpfs 1.9G 0 1.9G 0% /dev tmpfs 2.0G 0 2.0G 0% /dev/shm tmpfs 2.0G 17M 1.9G 1% /run tmpfs 5.0M 0 5.0M 0% /run/lock tmpfs 2.0G 0 2.0G 0% /sys/fs/cgroup /dev/nvme0n1p1 472M 49M 400M 11% /boot tmpfs 391M 0 391M 0% /run/user/1000

    PCIe

    root@debian:~# lspci 00:00.0 PCI bridge: Fuzhou Rockchip Electronics Co., Ltd Device 3566 (rev 01) 01:00.0 Non-Volatile memory controller: Samsung Electronics Co Ltd NVMe SSD Controller SM981/PM981

    Es handelt sich um ein Debian Buster 10

    VERSION="10 (buster)"

    Wollen wir das? Nö

    # deb http://deb.debian.org/debian/ buster main deb http://deb.debian.org/debian/ bullseye main deb-src http://deb.debian.org/debian/ bullseye main deb http://security.debian.org/debian-security bullseye-security main deb-src http://security.debian.org/debian-security bullseye-security main # buster-updates, previously known as 'volatile' deb http://deb.debian.org/debian/ bullseye-updates main deb-src http://deb.debian.org/debian/ bullseye-updates main

    Danach ein

    apt update && apt upgrade

    Neustarten und wir haben ein Debian Bullseye 11 🙂 Dieses Debian nutzt so jetzt nicht den Kernel von Debian, sondern Peters

    root@debian:/etc# uname -a Linux debian 5.17.0-rc3 #1 SMP PREEMPT Wed Feb 16 00:41:25 UTC 2022 aarch64 GNU/Linux

    Die Entscheidung überlasse ich Euch, ob ihr das Ändern wollt. Ich lasse das jetzt mal so. Wenn ihr wollt, das die Installation von alleine startet, dann müsst ihr Label 0 anpassen, das startet nach einem Timeout automatisch.